Project REDIDIT.......
-
Maverick
Just looking in Syddy 
Back from a visit to the US, Canada, and a cruise to Alaska with Pam.
Good to see things are progressing- I cannot wait for 1.28a to be out- it is almost a millstone.
Best wishes to you and your Family- Pam's Sydney folk are coming over in a few weeks as it is her (Adelaide) daughter's 50th.
Best wishes
Hi Jel, good to see you had a good time overseas.
Give our love to Pam and the family.
Yes, it will be great to see 1.28a released. It has had a long gestation period, and it should be a very pretty baby at its launch.
I must say I do miss all the buzz and activity from when I was still active in the EAW area. I guess there comes a time when one has to move on and leave the scene to the younger generation (you excepted ). Some of the old ones had to stay behind and keep the whipper snappers in check.
The wife and I will also be heading overseas (Vietnam) towards the end of the year, and we are looking forward to the break.
Make sure you let me know next time you come up to Sydney, and we will get together again.
Good luck with the 1.28a release as well as with the family.
Syddy
Give our love to Pam and the family.
Yes, it will be great to see 1.28a released. It has had a long gestation period, and it should be a very pretty baby at its launch.
I must say I do miss all the buzz and activity from when I was still active in the EAW area. I guess there comes a time when one has to move on and leave the scene to the younger generation (you excepted
The wife and I will also be heading overseas (Vietnam) towards the end of the year, and we are looking forward to the break.
Make sure you let me know next time you come up to Sydney, and we will get together again.
Good luck with the 1.28a release as well as with the family.
Syddy
Syddy........Just another breed of COOL CAT
Hi Mav,
I have sent you another file set with a working menu system for the Entry Menu, the Host Menu, and the Client Menu. Sent via attachment to your email account.
That set should be complete enough for you to integrate your sound code into it.
I still want to do some modifications with the menu code as there are some parts of it that I am not overly happy with, but at least it will demonstrate how generic controls get used inside of multiple menu screens.(Host and Client menu screens use shared generic controls in this sample)
Let us know if any problems.
Syd
Syddy........Just another breed of COOL CAT
Hi Mav,
Have a look at this game library.
http://www.esenthel.com/
I have been playing with it over the last 2 days. It has impressed me greatly.
It is free for non-commercial projects, and provides almost everything one can possibly imagine, in it.
Although it does not provide shader access from within the free version, it does have prebuilt shaders in it that can be used. One of them is an infinite ocean shader.... an ocean that goes on for ever with all the features like reflection, refraction, transparency...etc.
It is amazing what can be created in very minimal code with this library. Just a shame that the documentation is very poor for my likings, but it has over 100 tutorial samples to demonstrate various parts of code usage.
GULP!!!! I am starting to think that this engine is the one we should be using.
Please have a quick look at it and let me know what you think.
EDIT: Each of these scenes took around one page of code to create.
http://i16.photobucket.com/albums/b49/s ... ample1.jpg
http://i16.photobucket.com/albums/b49/s ... ample2.jpg
Last edited by sydbod on Sat Jul 25, 2009 4:37 pm, edited 1 time in total.
Syddy........Just another breed of COOL CAT
The more I play with this new "esenthel" game library, the more I like it.
Had a quick play to see what it is like creating TRUE volumetric clouds that are reproduced exactly identically on all players machines.
Here is a cloud that fits that requirement.
It is roughly 4KMx4KM and 0.5KM thick. Looking from the ground upwards.
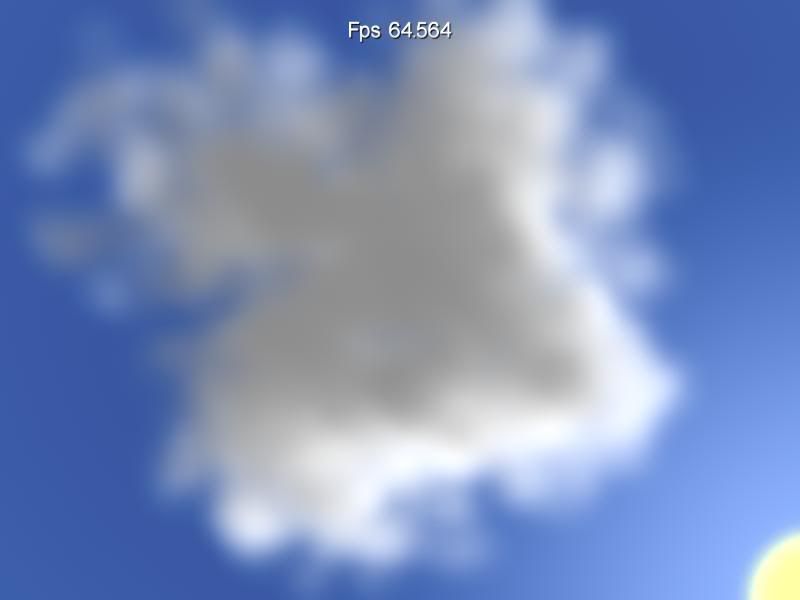
It is the sort of thing that one requires to be able to get Knegel off ones tail in an emergency.
Notice how nicely the sun lights up the proper part of the cloud.
Yes it took a good day to figure it out(poor documentation), but it was finally only around half a page of code. This is brilliant.
Regards Syd
Had a quick play to see what it is like creating TRUE volumetric clouds that are reproduced exactly identically on all players machines.
Here is a cloud that fits that requirement.
It is roughly 4KMx4KM and 0.5KM thick. Looking from the ground upwards.

It is the sort of thing that one requires to be able to get Knegel off ones tail in an emergency.
Notice how nicely the sun lights up the proper part of the cloud.
Yes it took a good day to figure it out(poor documentation), but it was finally only around half a page of code. This is brilliant.
Regards Syd
Syddy........Just another breed of COOL CAT
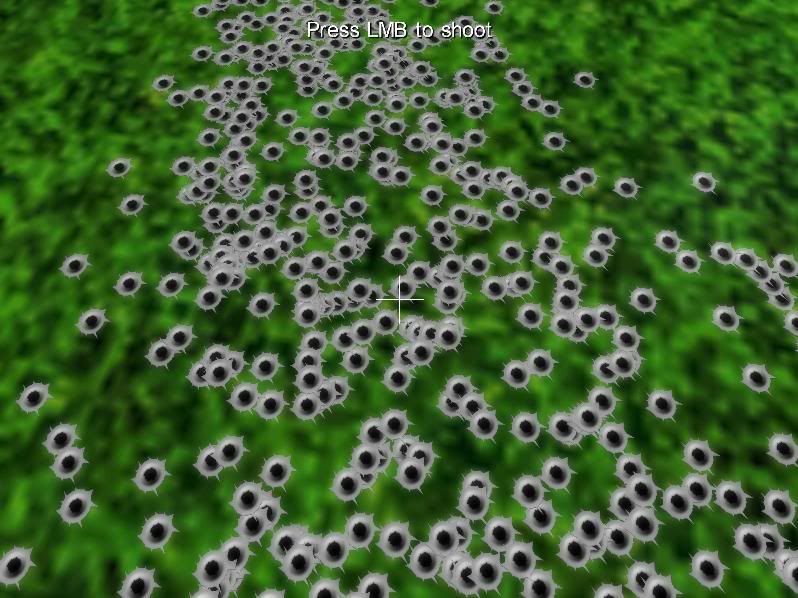
Have been having some fun with applying bullet holes to things.
The usual procedure for bullet holes is to have them visible for a predefined period of time and then they fade away.
Have been thinking it may be worthwhile to have a predefined max value of about 1000 bullet holes allowed to be visible at any one time.
Once we run out of bullet holes, then the oldest bullet hole gets reused as a new bullet hole.
This way visual damage stays visible as long as possible.
Once an aircraft gets destroyed, it will also free up those bullet holes to go into the free pool.

Syddy........Just another breed of COOL CAT
Have been having some fun (well not really, as I hate making models ) learning to make models for some of these newer game engines.
It looks like the most important 3D model formats are *.OBJ and *.X formats.
After spending a huge amount of time trying to find a 3D modeling program that actually is even half intuative for the way I tend to think, I suspect I have finally found it.
http://www.misfitcode.com/misfitmodel3d/
It actually works with putting down 3D vertices and creating triangular surfaces from these vertices.(very similar to how we do things in EAW, rather than creating 3D meshes and pulling and tweaking these meshes.
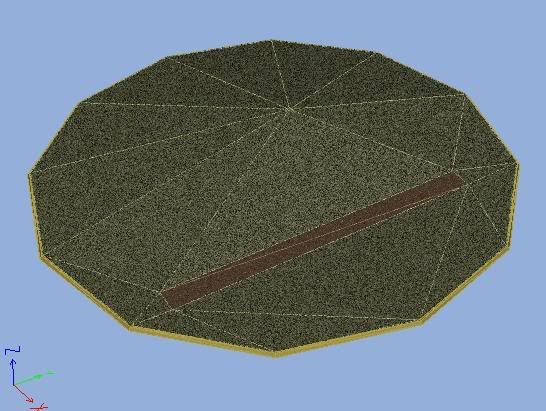
The first thing I required was to make an island for testing some scenery code for the flight sim project.
It is a circular island of 2KM diam. (just a simple mound with some flat terrain on it)
It is very simple with only 3 mesh layers, 57 vertices, 68 triangles, and the beach part goes from -5m under water up to 6m above water. There is a simple runway on the island on the flat part.
I left the triangle edges visiable in the screen capture so one can see how simple the geometry actually is. One would normally use up to 10,000 triangles to make a good looking island if one wanted to.
The next task is to see how this little island gets imported into a game engine with an ocean created around it.
Till next time.
It looks like the most important 3D model formats are *.OBJ and *.X formats.
After spending a huge amount of time trying to find a 3D modeling program that actually is even half intuative for the way I tend to think, I suspect I have finally found it.
http://www.misfitcode.com/misfitmodel3d/
It actually works with putting down 3D vertices and creating triangular surfaces from these vertices.(very similar to how we do things in EAW, rather than creating 3D meshes and pulling and tweaking these meshes.
The first thing I required was to make an island for testing some scenery code for the flight sim project.
It is a circular island of 2KM diam. (just a simple mound with some flat terrain on it)
It is very simple with only 3 mesh layers, 57 vertices, 68 triangles, and the beach part goes from -5m under water up to 6m above water. There is a simple runway on the island on the flat part.
I left the triangle edges visiable in the screen capture so one can see how simple the geometry actually is. One would normally use up to 10,000 triangles to make a good looking island if one wanted to.

The next task is to see how this little island gets imported into a game engine with an ocean created around it.
Till next time.
Syddy........Just another breed of COOL CAT
While I am waiting for an addition(by the developer) to be included in one of the game libraries that I am playing with, I thought it may be interesting to play with DirectX9 directly, rather than going through a game library.
I decided to set up 2 cameras so that one camera would render the back half of the island, and another camera would render the front half of the island, and finally to combine the images of the 2 cameras into one rendering.
The reason to do this is to enable the use of a huge near to far ratio for the view without having Z fighting problems.
Please note that I am only using ambient light (no directional light) so shadows and different illuminated surfaces will not be highlighted in this test.
The distant view camera component:

The near view camera component:

The combined view of the 2 cameras:
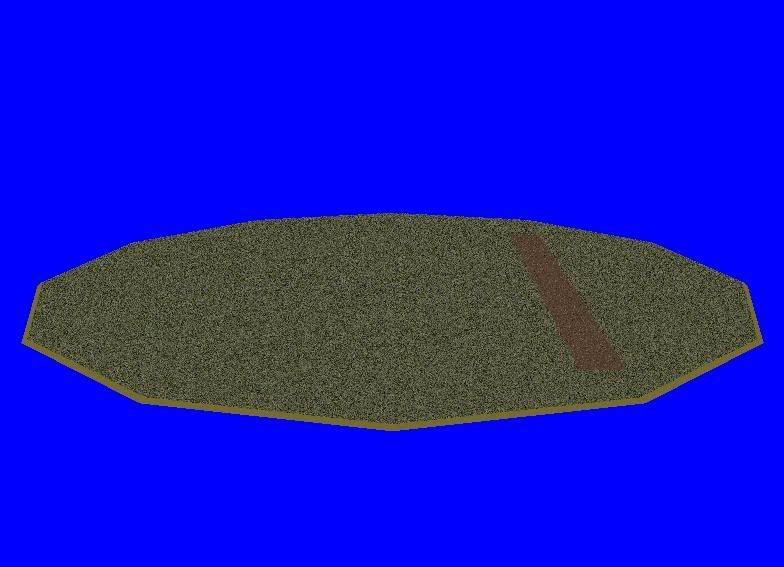
Things mate up very nicely. I am starting to think that maybe it would be easier (and produce faster operating code) to just forget about game libraries and program directly in DirectX9.
For those that are interested, here is the code used to produce the above test.
I decided to set up 2 cameras so that one camera would render the back half of the island, and another camera would render the front half of the island, and finally to combine the images of the 2 cameras into one rendering.
The reason to do this is to enable the use of a huge near to far ratio for the view without having Z fighting problems.
Please note that I am only using ambient light (no directional light) so shadows and different illuminated surfaces will not be highlighted in this test.
The distant view camera component:

The near view camera component:

The combined view of the 2 cameras:

Things mate up very nicely. I am starting to think that maybe it would be easier (and produce faster operating code) to just forget about game libraries and program directly in DirectX9.
For those that are interested, here is the code used to produce the above test.
Code: Select all
//-----------------------------------------------------------------------------
// File: Meshes.cpp
//
// Desc: For advanced geometry, most apps will prefer to load pre-authored
//       Meshes from a file. Fortunately, when using Meshes, D3DX does most of
//       the work for this, parsing a geometry file and creating vertx buffers
//       (and index buffers) for us. This tutorial shows how to use a D3DXMESH
//       object, including loading it from a file and rendering it. One thing
//       D3DX does not handle for us is the materials and textures for a mesh,
//       so note that we have to handle those manually.
//
//       Note: one advanced (but nice) feature that we don't show here is that
//       when cloning a mesh we can specify the FVF. So, regardless of how the
//       mesh was authored, we can add/remove normals, add more texture
//       coordinate sets (for multi-texturing), etc.
//
// Copyright (c) Microsoft Corporation. All rights reserved.
//
//            **** MODIFIED BY SYDBOD to use 2 cameras ****
//-----------------------------------------------------------------------------
#include <Windows.h>
#include <mmsystem.h>
#include <d3dx9.h>
#pragma warning( disable : 4996 ) // disable deprecated warning
#include <strsafe.h>
#pragma warning( default : 4996 )


//-----------------------------------------------------------------------------
// Global variables
//-----------------------------------------------------------------------------
LPDIRECT3D9         g_pD3D = NULL; // Used to create the D3DDevice
LPDIRECT3DDEVICE9   g_pd3dDevice = NULL; // Our rendering device

LPD3DXMESH          g_pMesh = NULL; // Our mesh object in sysmem
D3DMATERIAL9*       g_pMeshMaterials = NULL; // Materials for our mesh
LPDIRECT3DTEXTURE9* g_pMeshTextures = NULL; // Textures for our mesh
DWORD               g_dwNumMaterials = 0L;   // Number of mesh materials


//-----------------------------------------------------------------------------
// Name: InitD3D()
// Desc: Initializes Direct3D
//-----------------------------------------------------------------------------
HRESULT InitD3D( HWND hWnd )
{
    // Create the D3D object.
    if( NULL == ( g_pD3D = Direct3DCreate9( D3D_SDK_VERSION ) ) )
        return E_FAIL;

    // Set up the structure used to create the D3DDevice. Since we are now
    // using more complex geometry, we will create a device with a zbuffer.
    D3DPRESENT_PARAMETERS d3dpp;
    ZeroMemory( &d3dpp, sizeof( d3dpp ) );
    d3dpp.Windowed = TRUE;
    d3dpp.SwapEffect = D3DSWAPEFFECT_DISCARD;
    d3dpp.BackBufferFormat = D3DFMT_UNKNOWN;
    d3dpp.EnableAutoDepthStencil = TRUE;
   d3dpp.AutoDepthStencilFormat = D3DFMT_D24S8;

    // Create the D3DDevice
    if( FAILED( g_pD3D->CreateDevice( D3DADAPTER_DEFAULT, D3DDEVTYPE_HAL, hWnd,
                                      D3DCREATE_SOFTWARE_VERTEXPROCESSING,
                                      &d3dpp, &g_pd3dDevice ) ) )
    {
        return E_FAIL;
    }

    // Turn on the zbuffer
    g_pd3dDevice->SetRenderState( D3DRS_ZENABLE, TRUE );

    // Turn on ambient lighting
    g_pd3dDevice->SetRenderState( D3DRS_AMBIENT, D3DCOLOR_XRGB( 155, 155, 155 ) );

    return S_OK;
}


//-----------------------------------------------------------------------------
// Name: InitGeometry()
// Desc: Load the mesh and build the material and texture arrays
//-----------------------------------------------------------------------------
HRESULT InitGeometry()
{
    LPD3DXBUFFER pD3DXMtrlBuffer;

    // Load the mesh from the specified file
    if( FAILED( D3DXLoadMeshFromX( L"ISLAND.x", D3DXMESH_SYSTEMMEM,
                                   g_pd3dDevice, NULL,
                                   &pD3DXMtrlBuffer, NULL, &g_dwNumMaterials,
                                   &g_pMesh ) ) )
    {
            MessageBox( NULL, L"Could not find tiger.x", L"Meshes.exe", MB_OK );
            return E_FAIL;
    }

    // We need to extract the material properties and texture names from the
    // pD3DXMtrlBuffer
    D3DXMATERIAL* d3dxMaterials = ( D3DXMATERIAL* )pD3DXMtrlBuffer->GetBufferPointer();
    g_pMeshMaterials = new D3DMATERIAL9[g_dwNumMaterials];
    if( g_pMeshMaterials == NULL )
        return E_OUTOFMEMORY;
    g_pMeshTextures = new LPDIRECT3DTEXTURE9[g_dwNumMaterials];
    if( g_pMeshTextures == NULL )
        return E_OUTOFMEMORY;

    for( DWORD i = 0; i < g_dwNumMaterials; i++ )
    {
        // Copy the material
        g_pMeshMaterials[i] = d3dxMaterials[i].MatD3D;

        // Set the ambient color for the material (D3DX does not do this)
        g_pMeshMaterials[i].Ambient = g_pMeshMaterials[i].Diffuse;

        g_pMeshTextures[i] = NULL;
        if( d3dxMaterials[i].pTextureFilename != NULL && lstrlenA( d3dxMaterials[i].pTextureFilename ) > 0 )
        {
            // Create the texture
            if( FAILED( D3DXCreateTextureFromFileA( g_pd3dDevice, d3dxMaterials[i].pTextureFilename, &g_pMeshTextures[i] ) ) )
                    MessageBox( NULL, L"Could not find texture map", L"Meshes.exe", MB_OK );
        }
    }

    // Done with the material buffer
    pD3DXMtrlBuffer->Release();

    return S_OK;
}


//-----------------------------------------------------------------------------
// Name: Cleanup()
// Desc: Releases all previously initialized objects
//-----------------------------------------------------------------------------
VOID Cleanup()
{
    if( g_pMeshMaterials != NULL )
        delete[] g_pMeshMaterials;

    if( g_pMeshTextures )
    {
        for( DWORD i = 0; i < g_dwNumMaterials; i++ )
        {
            if( g_pMeshTextures[i] )
                g_pMeshTextures[i]->Release();
        }
        delete[] g_pMeshTextures;
    }
    if( g_pMesh != NULL )
        g_pMesh->Release();

    if( g_pd3dDevice != NULL )
        g_pd3dDevice->Release();

    if( g_pD3D != NULL )
        g_pD3D->Release();
}


//-----------------------------------------------------------------------------
// Name: SetupMatrices()
// Desc: Sets up the world, view, and projection transform matrices for distant camera.
//-----------------------------------------------------------------------------
VOID SetupDistantMatrices()
{
    // Set up world matrix
    D3DXMATRIXA16 matWorld;
    D3DXMatrixRotationY( &matWorld, 0.0f /* timeGetTime() / 1000.0f*/ );
    g_pd3dDevice->SetTransform( D3DTS_WORLD, &matWorld );

    // Set up our view matrix. A view matrix can be defined given an eye point,
    // a point to lookat, and a direction for which way is up. Here, we set the
    // eye five units back along the z-axis and up three units, look at the
    // origin, and define "up" to be in the y-direction.
    D3DXVECTOR3 vEyePt( 0.0f, 1000.0f,-2500.0f );
    D3DXVECTOR3 vLookatPt( 0.0f, 0.0f, 0.0f );
    D3DXVECTOR3 vUpVec( 0.0f, 1.0f, 0.0f );
    D3DXMATRIXA16 matView;
    D3DXMatrixLookAtLH( &matView, &vEyePt, &vLookatPt, &vUpVec );
    g_pd3dDevice->SetTransform( D3DTS_VIEW, &matView );

    // For the projection matrix, we set up a perspective transform (which
    // transforms geometry from 3D view space to 2D viewport space, with
    // a perspective divide making objects smaller in the distance). To build
    // a perpsective transform, we need the field of view (1/4 pi is common),
    // the aspect ratio, and the near and far clipping planes (which define at
    // what distances geometry should be no longer be rendered).
    D3DXMATRIXA16 matProj;
    D3DXMatrixPerspectiveFovLH( &matProj, D3DX_PI / 4, 1.0f, 2500.0f, 10000.0f );
    g_pd3dDevice->SetTransform( D3DTS_PROJECTION, &matProj );
}


//-----------------------------------------------------------------------------
// Name: SetupMatrices()
// Desc: Sets up the world, view, and projection transform matrices for close camera.
//-----------------------------------------------------------------------------
VOID SetupCloseMatrices()
{
    // Set up world matrix
    D3DXMATRIXA16 matWorld;
    D3DXMatrixRotationY( &matWorld, 0.0f/*timeGetTime() / 1000.0f*/ );
    g_pd3dDevice->SetTransform( D3DTS_WORLD, &matWorld );

    // Set up our view matrix. A view matrix can be defined given an eye point,
    // a point to lookat, and a direction for which way is up. Here, we set the
    // eye five units back along the z-axis and up three units, look at the
    // origin, and define "up" to be in the y-direction.
    D3DXVECTOR3 vEyePt( 0.0f, 1000.0f,-2500.0f );
    D3DXVECTOR3 vLookatPt( 0.0f, 0.0f, 0.0f );
    D3DXVECTOR3 vUpVec( 0.0f, 1.0f, 0.0f );
    D3DXMATRIXA16 matView;
    D3DXMatrixLookAtLH( &matView, &vEyePt, &vLookatPt, &vUpVec );
    g_pd3dDevice->SetTransform( D3DTS_VIEW, &matView );

    // For the projection matrix, we set up a perspective transform (which
    // transforms geometry from 3D view space to 2D viewport space, with
    // a perspective divide making objects smaller in the distance). To build
    // a perpsective transform, we need the field of view (1/4 pi is common),
    // the aspect ratio, and the near and far clipping planes (which define at
    // what distances geometry should be no longer be rendered).
    D3DXMATRIXA16 matProj;
    D3DXMatrixPerspectiveFovLH( &matProj, D3DX_PI / 4, 1.0f, 1.0f, 2500.0f );
    g_pd3dDevice->SetTransform( D3DTS_PROJECTION, &matProj );
}


//-----------------------------------------------------------------------------
// Name: RenderBack()
// Desc: Draws the distant scene component
//-----------------------------------------------------------------------------
VOID RenderBack()
{
        // Setup the world, view, and projection matrices for distant camera
        SetupDistantMatrices();

        // Meshes are divided into subsets, one for each material. Render them in
        // a loop
        for( DWORD i = 0; i < g_dwNumMaterials; i++ )
        {
            // Set the material and texture for this subset
            g_pd3dDevice->SetMaterial( &g_pMeshMaterials[i] );
            g_pd3dDevice->SetTexture( 0, g_pMeshTextures[i] );

            // Draw the mesh subset
            g_pMesh->DrawSubset( i );
        }
}


//-----------------------------------------------------------------------------
// Name: RenderFront()
// Desc: Draws the close scene component
//-----------------------------------------------------------------------------
VOID RenderFront()
{
        // Setup the world, view, and projection matrices for close camera
        SetupCloseMatrices();

        // Meshes are divided into subsets, one for each material. Render them in
        // a loop
        for( DWORD i = 0; i < g_dwNumMaterials; i++ )
        {
            // Set the material and texture for this subset
            g_pd3dDevice->SetMaterial( &g_pMeshMaterials[i] );
            g_pd3dDevice->SetTexture( 0, g_pMeshTextures[i] );

            // Draw the mesh subset
            g_pMesh->DrawSubset( i );
        }
}


//-----------------------------------------------------------------------------
// Name: Render()
// Desc: Draws the scene
//-----------------------------------------------------------------------------
VOID Render()
{
    // Begin the scene
    if( SUCCEEDED( g_pd3dDevice->BeginScene() ) )
    {
      g_pd3dDevice->Clear( 0, NULL, D3DCLEAR_TARGET | D3DCLEAR_ZBUFFER, D3DCOLOR_XRGB( 0, 0, 255 ), 1.0f, 0 );// Clear the backbuffer and the zbuffer
      RenderBack();

      g_pd3dDevice->Clear( 0, NULL, D3DCLEAR_ZBUFFER, D3DCOLOR_XRGB( 0, 0, 255 ), 1.0f, 0 );// Clear the zbuffer
      RenderFront();


        // End the scene
        g_pd3dDevice->EndScene();
    }

    // Present the backbuffer contents to the display
    g_pd3dDevice->Present( NULL, NULL, NULL, NULL );
}


//-----------------------------------------------------------------------------
// Name: MsgProc()
// Desc: The window's message handler
//-----------------------------------------------------------------------------
LRESULT WINAPI MsgProc( HWND hWnd, UINT msg, WPARAM wParam, LPARAM lParam )
{
    switch( msg )
    {
        case WM_DESTROY:
            Cleanup();
            PostQuitMessage( 0 );
            return 0;
    }

    return DefWindowProc( hWnd, msg, wParam, lParam );
}


//-----------------------------------------------------------------------------
// Name: WinMain()
// Desc: The application's entry point
//-----------------------------------------------------------------------------
INT WINAPI wWinMain( HINSTANCE hInst, HINSTANCE, LPWSTR, INT )
{
    // Register the window class
    WNDCLASSEX wc =
    {
        sizeof( WNDCLASSEX ), CS_CLASSDC, MsgProc, 0L, 0L,
        GetModuleHandle( NULL ), NULL, NULL, NULL, NULL,
        L"D3D Tutorial", NULL
    };
    RegisterClassEx( &wc );

    // Create the application's window
    HWND hWnd = CreateWindow( L"D3D Tutorial", L"D3D Tutorial 06: Meshes",
                              WS_OVERLAPPEDWINDOW, 0, 0, 800, 600,
                              NULL, NULL, wc.hInstance, NULL );

    // Initialize Direct3D
    if( SUCCEEDED( InitD3D( hWnd ) ) )
    {
        // Create the scene geometry
        if( SUCCEEDED( InitGeometry() ) )
        {
            // Show the window
            ShowWindow( hWnd, SW_SHOWDEFAULT );
            UpdateWindow( hWnd );

            // Enter the message loop
            MSG msg;
            ZeroMemory( &msg, sizeof( msg ) );
            while( msg.message != WM_QUIT )
            {
                if( PeekMessage( &msg, NULL, 0U, 0U, PM_REMOVE ) )
                {
                    TranslateMessage( &msg );
                    DispatchMessage( &msg );
                }
                else
                    Render();
            }
        }
    }

    UnregisterClass( L"D3D Tutorial", wc.hInstance );
    return 0;
}
Syddy........Just another breed of COOL CAT
Another day of fun and frustration.
When I was making that island model, I created it as a *.obj model.
I used another program to convert it to a *.X model, as D3D likes to work with *.X models. In the conversion, I forgot to tick the (add normals) to the conversion, so I had wasted the better part of the day, wondering why I could not get directional light to work on that model.
Oh well, that problem is sorted out .
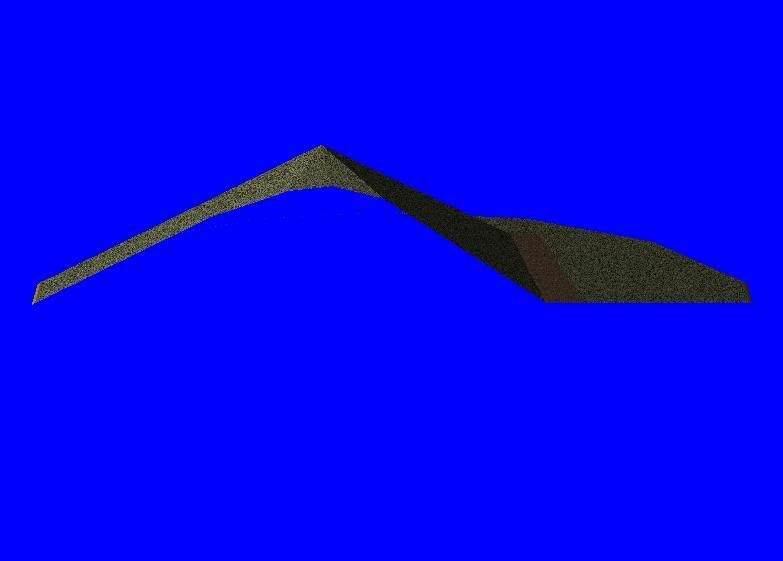
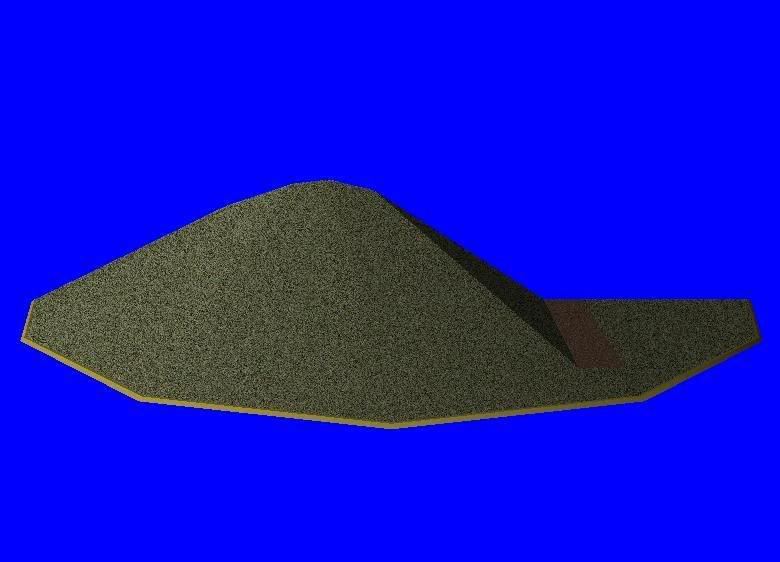
I have increased the height of the mountain on the island.
Have added a simulated SUN, shining from the left side.
20% of the light is ambient, and 80% is diffuse (directional).
I am running PHONG shading to smooth out the transitions from one triangle to the next. We could also create soft normals to smooth it out even more, but I wanted to leave the sharp transition visiable from the runway to the side of the mountain.
The back camera :
The front camera:
The combined image:
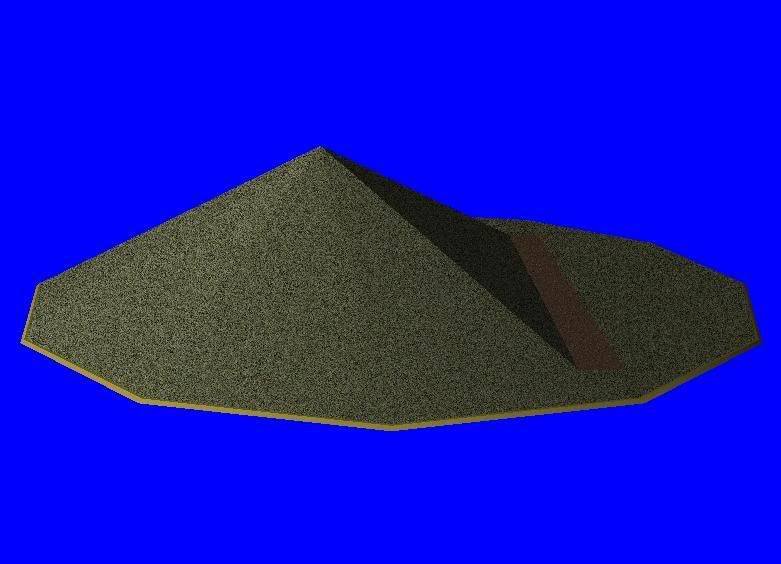
I also had to modify the camera code to cause a very small overlap of the back and front image views as occasionally one could see the odd pixel where the 2 images left a small gap.
I am still anguishing about if I should once again change and go directly to programing with D3D. May have to play around with D3D a bit more and see.
EDIT: a 40% ambient to 60% diffuse looks a better balance.

When I was making that island model, I created it as a *.obj model.
I used another program to convert it to a *.X model, as D3D likes to work with *.X models. In the conversion, I forgot to tick the (add normals) to the conversion, so I had wasted the better part of the day, wondering why I could not get directional light to work on that model.
Oh well, that problem is sorted out .
I have increased the height of the mountain on the island.
Have added a simulated SUN, shining from the left side.
20% of the light is ambient, and 80% is diffuse (directional).
I am running PHONG shading to smooth out the transitions from one triangle to the next. We could also create soft normals to smooth it out even more, but I wanted to leave the sharp transition visiable from the runway to the side of the mountain.
The back camera :

The front camera:

The combined image:

I also had to modify the camera code to cause a very small overlap of the back and front image views as occasionally one could see the odd pixel where the 2 images left a small gap.
I am still anguishing about if I should once again change and go directly to programing with D3D. May have to play around with D3D a bit more and see.
EDIT: a 40% ambient to 60% diffuse looks a better balance.

Syddy........Just another breed of COOL CAT
No, I have not died...
No, This area has not come to a halt....
While being tied up with personal problems at home, it has given me plenty of time to think.
I started off with playing with various game libraries.
They gave one the opportunity to get a good overview of what is involved in creating a game. The problem one faces is that unless one wants to create a First Person Shooter type game with a limited terrain, virtually every game library had some sort of limitation that would bite me in the backside.
This naturally leads one to delve to a lower and lower level of code generation where all of a sudden the game library becomes a liability, rather than an asset.
Programming directly into DirectX was the logical conclusion.
Now a heap of new capabilities are about to hit the world, things like ComputeShader, OpenCL, Dx11 features,..... etc. This will require a change of operating system to Win7. ... Well that sux big time for me.
The decision has now been made to go to a more general purpose and less restrictive programming base of OpenGL. This should allow the code to function over the full range of Windows,Apple,Linux.
OK it will be a new learning curve, but what the hell ... it can only kill me, and that would not be a great loss anyway.
So folks, this particular thread is now closed and a new thread will be started on the weekend dealing with the journey into the wonderful fantasy world of OpenGL and all that it entails.
Syddy........Just another breed of COOL CAT

