What's the difference between 1.2 and 1.6 aircraft files?
Essentially, none. The .tpc skinfiles and .3dz wire frame files in 1.2 and 1.6 are in exactly the same format. The only thing that is different is the filenaming convention. In 1.2 these files are still named for the original EAW slot in which they are to be used ie P109ETEX.TPC, P109EF.3DZ etc. In 1.6 all aircraft files are named simply PlaneTEX.tpc PlaneF.3dz etc.
How are these aircraft files used differently in 1.2 and 1.6?
To use a new skin/3dz fileset in 1.2 you could just simply drop it into the EAW root folder. The game will then use it in preference to the stock files in the CDF archives. Of course when you stopped using those files, to restore the default, you had to fish them out again.
One of the basic principles in the Code Group development of EAW is for players to avoid as far as possible the messy dropping files into folders, then having to remove them, and generally having swapping files in and out. The Group thinks that just gets tedious and ends up fragmenting your hard disk.That was why the "dir.set" system came in with EAW 128C in 2008, and the slotfree aircraft system came in principally with EAW 140 in 2014.
To use a new skin/3dz package in 160, you have to invest a little more time in the original setting up, but once it is done you can move your new aircraft in and out of the game with a couple of mouse clicks
How do you use a 1.2 skin in 1.6?
There are three steps. First convert the skin and 3dz filenames and the .3dz internal skin references, and find any other files that you need. Second load the new files into the Aircraft Inventory. Thirdly add the new plane to a planeset. Once you have the new plane in a planeset you can use the 1.6 Manager to load and unload the plane with a few mouseclicks. No more having to copy the files to the root folder, and then having to delete them, or move them to another folder afterward.
Contents of this thread
First find a skin you want to use and convert it. Find any other files needed
Find a home for newly converted files in the planes inventory
Adding your new plane inventory folder to a planeset
Fly your new plane
How to convert and use 1.2 skins in 1.6
Moderator: rotton50
-
Moggy
- Site Admin

- Posts: 4388
- Joined: Tue Feb 03, 2004 12:52 am
- Location: A slit trench near RAF Gravesend
- Contact:
First find a skin you want to use and convert it & find any other files needed
First find a skin you want to use and convert it
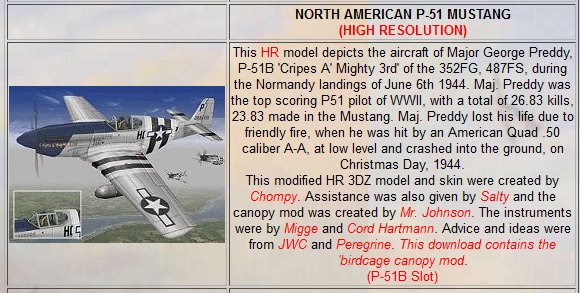
Lets assume you download Chompy's P-51B 'Cripes A' Mighty 3rd' of the 352FG, 487FS, during the Normandy landings of June 6th 1944, from Sandbagger's mighty Tally-Ho! site https://www.thatoneplease.co/chompy.html
When you unzip it, you have this collection of files:
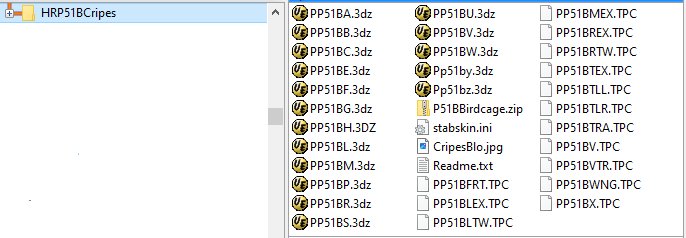
Note they are all in 1.2 format, with the "P51B" filename element.
Conversion to 1.6 format is in fact easily done with Jel's MogProg utility. Download it HERE
This utility was originally written to convery 1.2 plane files between the named slots. But it can now equally be used to convert 1.2 aircraft files to 1.6 aircraft files. The version of the PlaneCodes.txt file supplied in the downloaded has been edited so that a 1.6 conversion can be made.
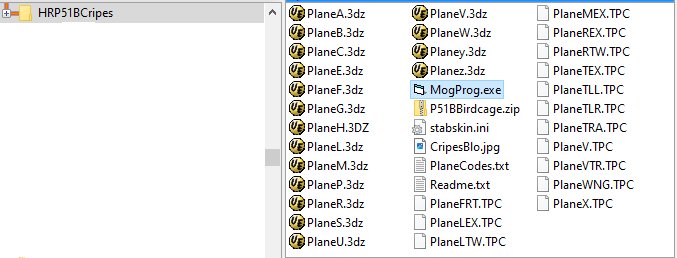
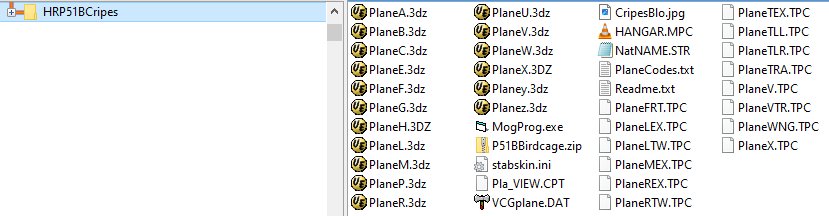
To use it, put MogProg.exe and PlaneCodes.txt in the same folder as the 1.2 skins/3dz files you want to convert. Run MogProg. In the drop down list select "LANE" as the plane code and click "OK re-write". Your 1.2 skins and 3dz files are converted to 1.6 useage:
Find any other files needed
Now, the thing is, just as if you using 1.2 and put that skin/3dz in the root EAW folder, you have to think about the other files that plane will need. Unlike in 1.2, in 1.6 your new plane cannot fall back on default aircraft files to make up for any files absent from the download. For example: If your downloaded file set doesn't have the cockpit/propview/wingview files, you won't see a cockpit in the game.
Luckily in a package like Chompy's from Tally-Ho, most of the cockpit/wingview files are present, and you have already converted them. That won't necessarily be the case with other downloads from other sites. But some needed files may still be missing.
For our present purposes (a hires, single engine plane, 1.2 conversion) a complete aircraft file set could consist of the following:
(1) The .3dz wire frame and .tpc skin files:
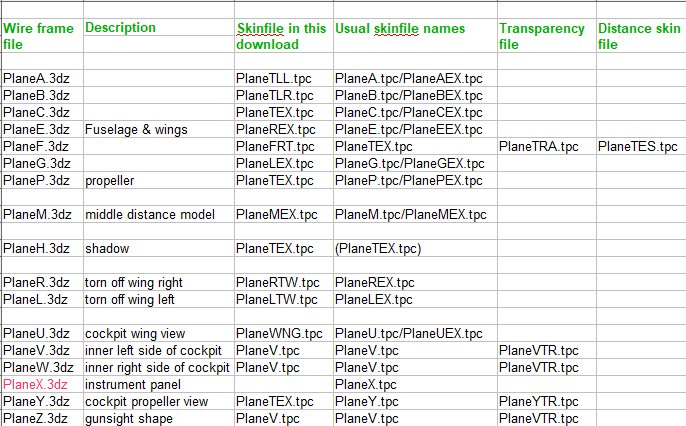
The file in red is missing from our download. The thing to notice here is that there are variations in the names EAW 1.2 modders gave to the skinfiles for the various .3dz files that constitute the model. As we can see, Chompy had his own scheme. The other thing to notice is that 1.6 does not use the S.3dz and T.3dz files that may be found in some downloads. So you can delete them from your download folder
(2) Other cockpit files
VCGPlane.dat (data for cockpit instrument panel guages)
Pla_view.cpt (actually the 2D cockpit file, but contains sprites for guage needles and other moving partts)
(3) Other files
Hangar.mpc (hangar screen)
NatName.str (display string for airforce/unit)
Chompy's original 1.2 download assumed that the plane would in 1.2, use the default files for the cockpit instrument panel, so he does not provide the VCG.dat, the view.cpt, or the X.3dz. He does supply the X.tpc, the panel skin file, to ensure that the panel colour fits with the rest of his aircraft skin. Chompy also assumed that the plane would use the default 1.2 files for the hangar screen. The NatName.str and its similarly named predecessors only came in with EAW 128 and the new style aircraft selection screens.
For the moment, and until you want to make hangar screens, or edit string files (yes you can do all of that!) there is an easy soloution to the missing files. The missing files can be copied from the default 1.6 P51B folder. Go and look in the Aircraft Inventory/ETO Planes/Skins/Allies/P51B folder:
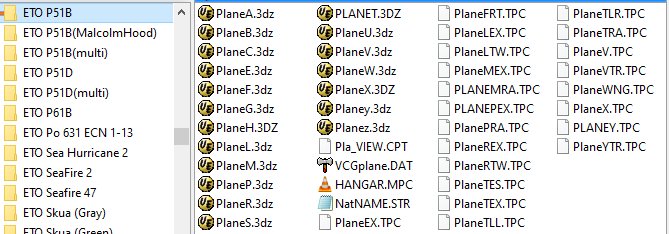
The missing files you want are
PlaneX.3dz
VCGPlane.dat
Pla_view.cpt
Hangar.mpc
NatName.str
Simply copy these files from the default 1.6 P51B folder to your converted download folder. And now you have:
Lets assume you download Chompy's P-51B 'Cripes A' Mighty 3rd' of the 352FG, 487FS, during the Normandy landings of June 6th 1944, from Sandbagger's mighty Tally-Ho! site https://www.thatoneplease.co/chompy.html
When you unzip it, you have this collection of files:
Note they are all in 1.2 format, with the "P51B" filename element.
Conversion to 1.6 format is in fact easily done with Jel's MogProg utility. Download it HERE
This utility was originally written to convery 1.2 plane files between the named slots. But it can now equally be used to convert 1.2 aircraft files to 1.6 aircraft files. The version of the PlaneCodes.txt file supplied in the downloaded has been edited so that a 1.6 conversion can be made.
To use it, put MogProg.exe and PlaneCodes.txt in the same folder as the 1.2 skins/3dz files you want to convert. Run MogProg. In the drop down list select "LANE" as the plane code and click "OK re-write". Your 1.2 skins and 3dz files are converted to 1.6 useage:
Find any other files needed
Now, the thing is, just as if you using 1.2 and put that skin/3dz in the root EAW folder, you have to think about the other files that plane will need. Unlike in 1.2, in 1.6 your new plane cannot fall back on default aircraft files to make up for any files absent from the download. For example: If your downloaded file set doesn't have the cockpit/propview/wingview files, you won't see a cockpit in the game.
Luckily in a package like Chompy's from Tally-Ho, most of the cockpit/wingview files are present, and you have already converted them. That won't necessarily be the case with other downloads from other sites. But some needed files may still be missing.
For our present purposes (a hires, single engine plane, 1.2 conversion) a complete aircraft file set could consist of the following:
(1) The .3dz wire frame and .tpc skin files:
The file in red is missing from our download. The thing to notice here is that there are variations in the names EAW 1.2 modders gave to the skinfiles for the various .3dz files that constitute the model. As we can see, Chompy had his own scheme. The other thing to notice is that 1.6 does not use the S.3dz and T.3dz files that may be found in some downloads. So you can delete them from your download folder
(2) Other cockpit files
VCGPlane.dat (data for cockpit instrument panel guages)
Pla_view.cpt (actually the 2D cockpit file, but contains sprites for guage needles and other moving partts)
(3) Other files
Hangar.mpc (hangar screen)
NatName.str (display string for airforce/unit)
Chompy's original 1.2 download assumed that the plane would in 1.2, use the default files for the cockpit instrument panel, so he does not provide the VCG.dat, the view.cpt, or the X.3dz. He does supply the X.tpc, the panel skin file, to ensure that the panel colour fits with the rest of his aircraft skin. Chompy also assumed that the plane would use the default 1.2 files for the hangar screen. The NatName.str and its similarly named predecessors only came in with EAW 128 and the new style aircraft selection screens.
For the moment, and until you want to make hangar screens, or edit string files (yes you can do all of that!) there is an easy soloution to the missing files. The missing files can be copied from the default 1.6 P51B folder. Go and look in the Aircraft Inventory/ETO Planes/Skins/Allies/P51B folder:
The missing files you want are
PlaneX.3dz
VCGPlane.dat
Pla_view.cpt
Hangar.mpc
NatName.str
Simply copy these files from the default 1.6 P51B folder to your converted download folder. And now you have:
Moggy
www.mogggy.org
www.mogggy.org
-
Moggy
- Site Admin
- Posts: 4388
- Joined: Tue Feb 03, 2004 12:52 am
- Location: A slit trench near RAF Gravesend
- Contact:
Find a home for newly converted files in the planes inventory
Find a home for newly converted files in the planes inventory
Have a look HERE as to how the Aircraft Inventory setup looks in 1.6
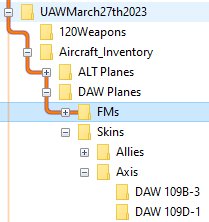
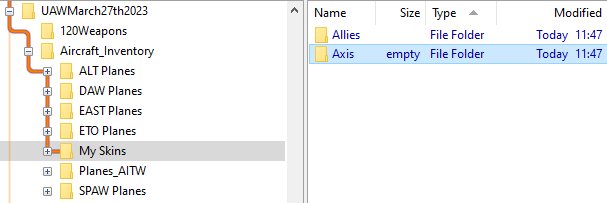
If you're going to make additional skins available to yourself, its best to make your own inventory main folder to hold the individual folders that will contain the actual plane files. So in the main Inventory folder make a new folder called something like "My Skins", and in accordance with 1.6 practice, make two folders in there "Allied" and "Axis".
In the "Allied" folder make a subfolder for your new plane and skin. With the p51 we downloaded and converted, you could name the folder "MYSKINS P51B 487 FS Normandy". Use that "MY SKINS" tag so that when you come to edit the plane set, you can clearly see in the planeset editor list that it is one of yours.
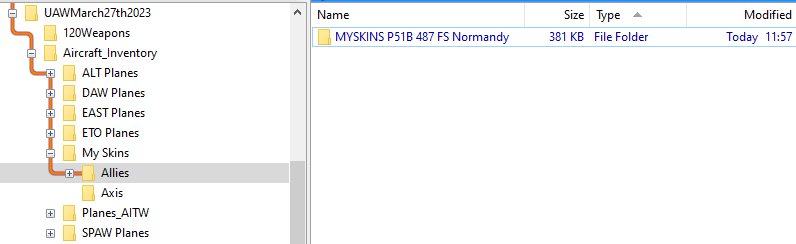
Now copy into that folder all the .3dz files, all the .tpc files, and the other files you moved in from the default folder VCGPlane.dat, Pla_view.cpt., hangar.mpc, and NatName.str. Also copy the .jpg file and Chompy's original readme.txt. Those last two are not needed to make the plane fly, but are just for your own reference. Your new plane folder now looks like this:

Have a look HERE as to how the Aircraft Inventory setup looks in 1.6
If you're going to make additional skins available to yourself, its best to make your own inventory main folder to hold the individual folders that will contain the actual plane files. So in the main Inventory folder make a new folder called something like "My Skins", and in accordance with 1.6 practice, make two folders in there "Allied" and "Axis".
In the "Allied" folder make a subfolder for your new plane and skin. With the p51 we downloaded and converted, you could name the folder "MYSKINS P51B 487 FS Normandy". Use that "MY SKINS" tag so that when you come to edit the plane set, you can clearly see in the planeset editor list that it is one of yours.
Now copy into that folder all the .3dz files, all the .tpc files, and the other files you moved in from the default folder VCGPlane.dat, Pla_view.cpt., hangar.mpc, and NatName.str. Also copy the .jpg file and Chompy's original readme.txt. Those last two are not needed to make the plane fly, but are just for your own reference. Your new plane folder now looks like this:
Moggy
www.mogggy.org
www.mogggy.org
-
Moggy
- Site Admin
- Posts: 4388
- Joined: Tue Feb 03, 2004 12:52 am
- Location: A slit trench near RAF Gravesend
- Contact:
Add your new plane inventory folder to a planeset
Add your new plane inventory folder to a planeset
See HERE as to how to use the PlaneSet Editor to edit a planeset.
What we're going to do is much the same process. Take an existing default planeset, edit your new P51 into it, and save it as your new planset. In due course, you can replace other default planes in your new planeset with other downloads.
So, open the PlanesetEditor PSM160V4.exe, which lives in the 1.6 root folder. The P51 we downloaded was in use during the Normandy landings, so we can choose the "ETO-1944 Early" default planeset as our starting point. So, In the right hand green panel, click on the "ETO-1944 Early" planeset.
Go to "level 2" (see level selection, top left of the Planeset Editor). Immediately, and before making any changes, enter a new name for your new Planeset (call your new planeset perhaps "My 1944 ETO Planeset") in the yellow rectangle at the bottom of the Level 2 page and press enter. If you don't do this, the default Planeset you first selected will be overwritten.
On the level 2 page, use the folder tree in the far left panel (headed "skin folders") to navigate to Aircraft Inventory/My Skins/Allies/MY SKINS P51B 487FS Normandy (ie the folder with your new plane). Click on that folder to highlight it.
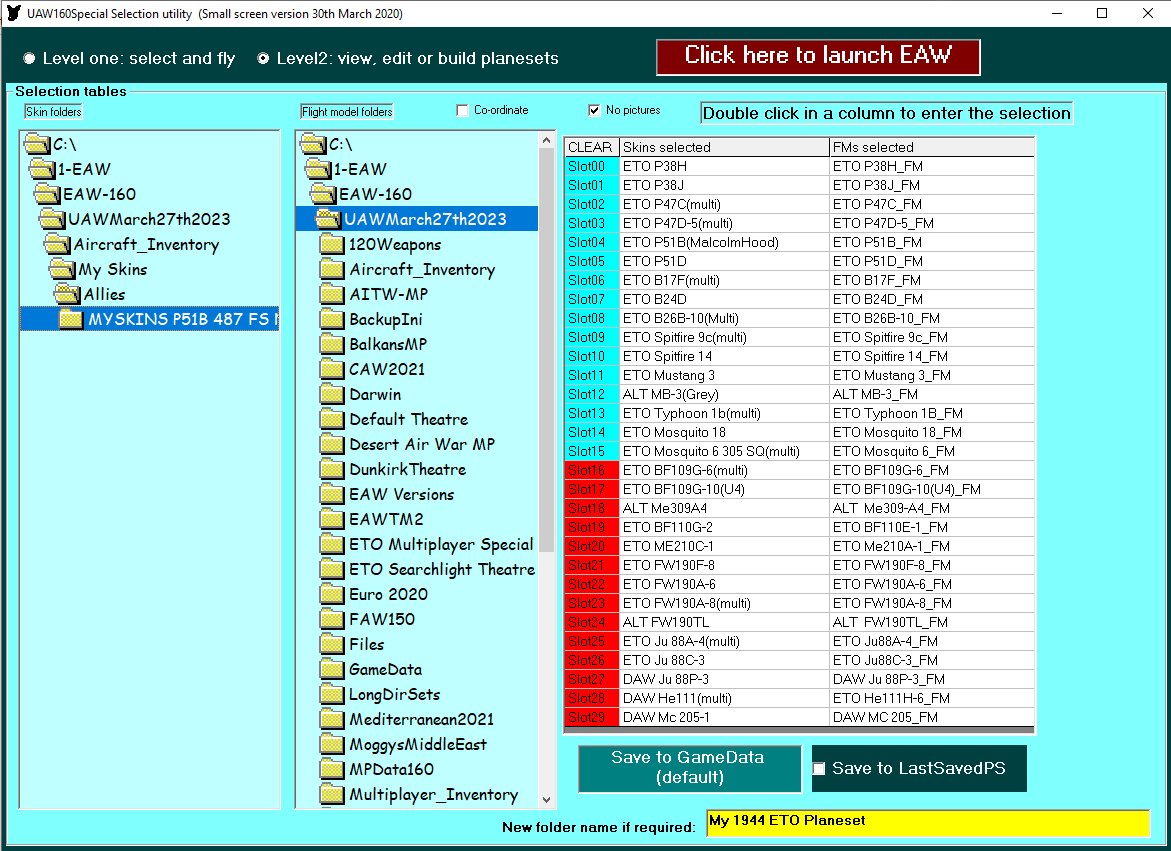
Note that in the list of the default planeset on the right, there is already a P51B in the fifth slot (which is slot 04 because the first slot is 00).
Now, having highlighted your new plane in the far left panel, double click on the P51B in the "Skins selected" column on the inside right. Your new plane replaces the default P51B as the plane selected.
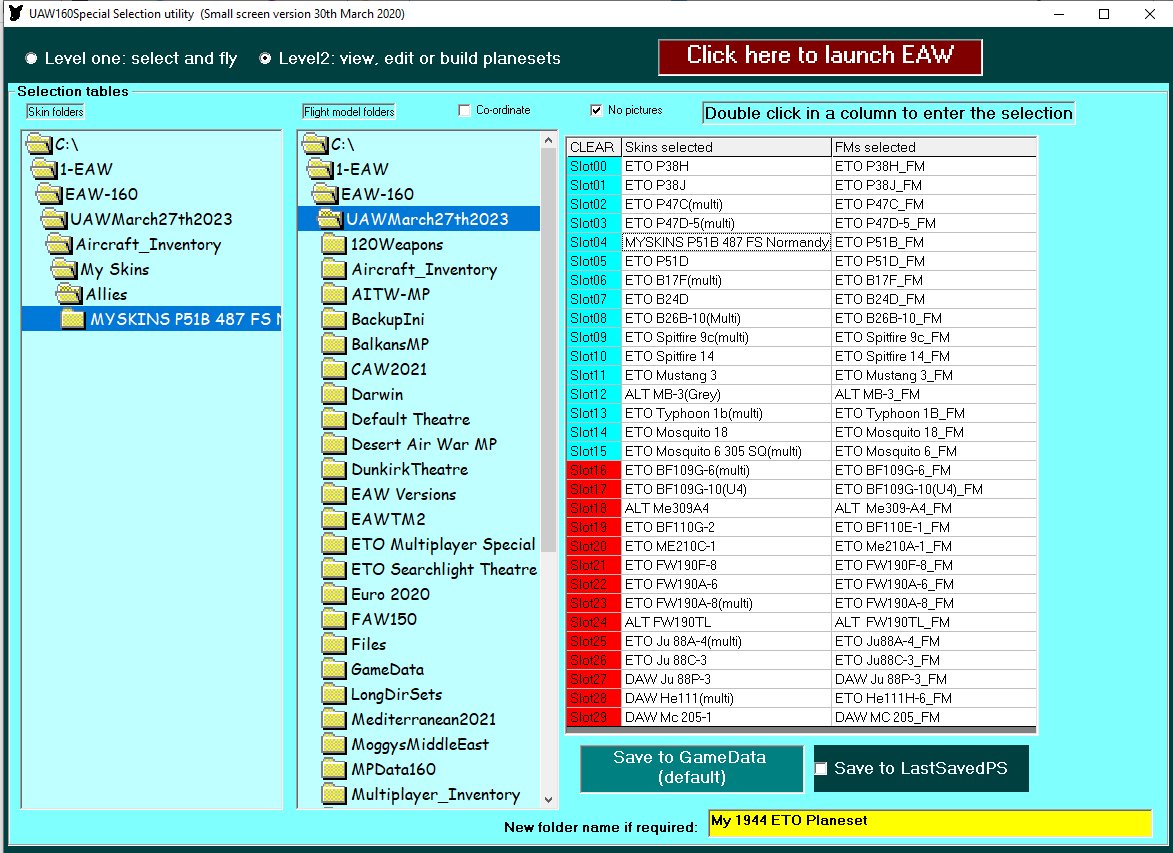
Though we are not changing the Flight Model (FM) for the plane, and will continue to use the default P51B FM, lets have a look at what we would do if we were looking for another FM to use.
On the level 2 page, use the folder tree in the inside left panel (headed "flight model folders") to navigate to Aircraft Inventory/ETO Planes/FMs/Allies When you are looking for FMs, always check the "ETO Planes" folder first. Run down the list until you come to "ETO P51B_FM". As you can see there is only one default FM available for the P51B, and checking in the list of the planeset "FMs Selected" column on the outside right, you can see it is already selected.
If you did want to change an FM, the procedure would be similar that for changing, or setting up a skin. Highlight by clicking the new chosen FM in the inside left "flight model folders" column, insert into the planeset by double clicking the FM to be replaced or set up in the "FMs Selected" column on the outside right.
Click on "Save to GameData" and to verify that you have created a new planeset, check the PlaneSets folder in the 1.6 root.
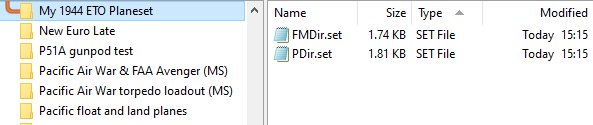
You should see, as above, your new planset folder "My 1944 ETO Planeset" has appeared, and contains the PDir.set and FMDir.set files which tell the exe where to find the planes and flight models in the set.
Now close down the PlaneSet Editor.
See HERE as to how to use the PlaneSet Editor to edit a planeset.
What we're going to do is much the same process. Take an existing default planeset, edit your new P51 into it, and save it as your new planset. In due course, you can replace other default planes in your new planeset with other downloads.
So, open the PlanesetEditor PSM160V4.exe, which lives in the 1.6 root folder. The P51 we downloaded was in use during the Normandy landings, so we can choose the "ETO-1944 Early" default planeset as our starting point. So, In the right hand green panel, click on the "ETO-1944 Early" planeset.
Go to "level 2" (see level selection, top left of the Planeset Editor). Immediately, and before making any changes, enter a new name for your new Planeset (call your new planeset perhaps "My 1944 ETO Planeset") in the yellow rectangle at the bottom of the Level 2 page and press enter. If you don't do this, the default Planeset you first selected will be overwritten.
On the level 2 page, use the folder tree in the far left panel (headed "skin folders") to navigate to Aircraft Inventory/My Skins/Allies/MY SKINS P51B 487FS Normandy (ie the folder with your new plane). Click on that folder to highlight it.
Note that in the list of the default planeset on the right, there is already a P51B in the fifth slot (which is slot 04 because the first slot is 00).
Now, having highlighted your new plane in the far left panel, double click on the P51B in the "Skins selected" column on the inside right. Your new plane replaces the default P51B as the plane selected.
Though we are not changing the Flight Model (FM) for the plane, and will continue to use the default P51B FM, lets have a look at what we would do if we were looking for another FM to use.
On the level 2 page, use the folder tree in the inside left panel (headed "flight model folders") to navigate to Aircraft Inventory/ETO Planes/FMs/Allies When you are looking for FMs, always check the "ETO Planes" folder first. Run down the list until you come to "ETO P51B_FM". As you can see there is only one default FM available for the P51B, and checking in the list of the planeset "FMs Selected" column on the outside right, you can see it is already selected.
If you did want to change an FM, the procedure would be similar that for changing, or setting up a skin. Highlight by clicking the new chosen FM in the inside left "flight model folders" column, insert into the planeset by double clicking the FM to be replaced or set up in the "FMs Selected" column on the outside right.
Click on "Save to GameData" and to verify that you have created a new planeset, check the PlaneSets folder in the 1.6 root.
You should see, as above, your new planset folder "My 1944 ETO Planeset" has appeared, and contains the PDir.set and FMDir.set files which tell the exe where to find the planes and flight models in the set.
Now close down the PlaneSet Editor.
Moggy
www.mogggy.org
www.mogggy.org
-
Moggy
- Site Admin
- Posts: 4388
- Joined: Tue Feb 03, 2004 12:52 am
- Location: A slit trench near RAF Gravesend
- Contact:
Fly your new plane
Fly your new plane
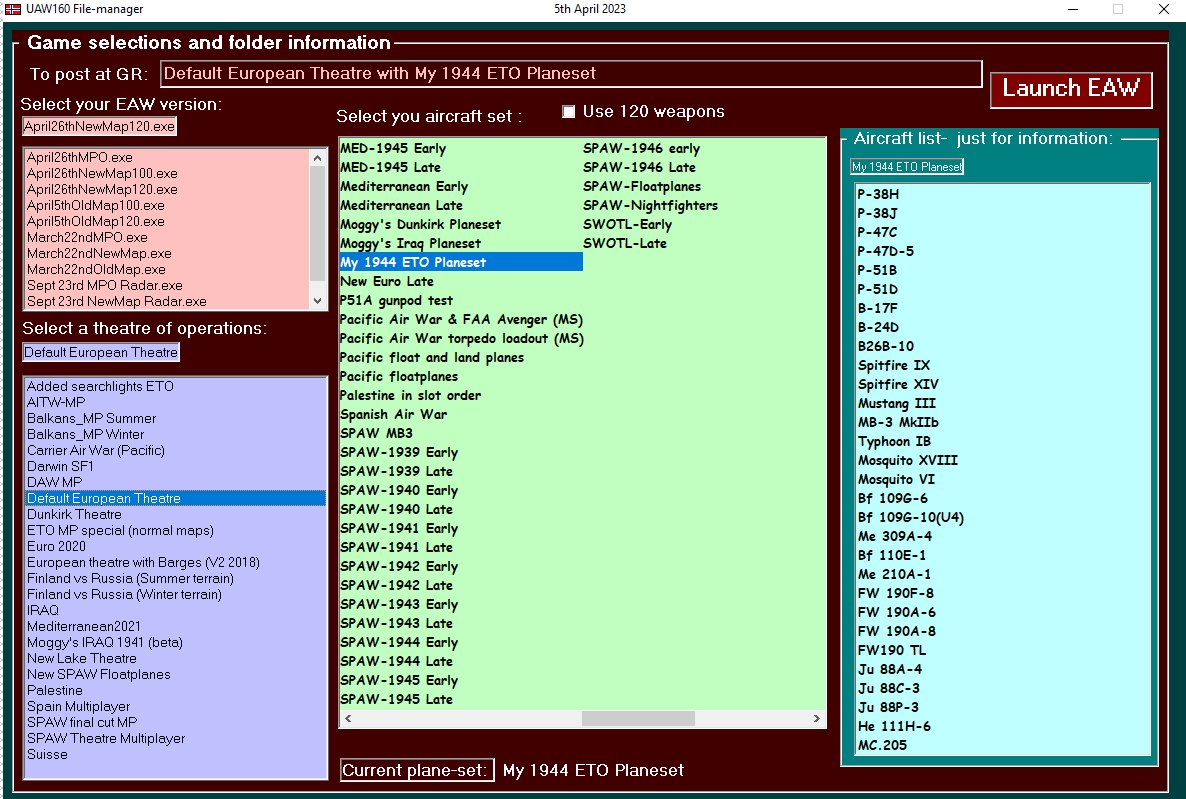
Open the 1.6 Manager. In the lower left panel select the Default European Theatre. In the centre panel select your new planeset "My 1944 ETO planeset". A list of the set appears in the right blue panel.
Click "Launch EAW". Choose a single mission.
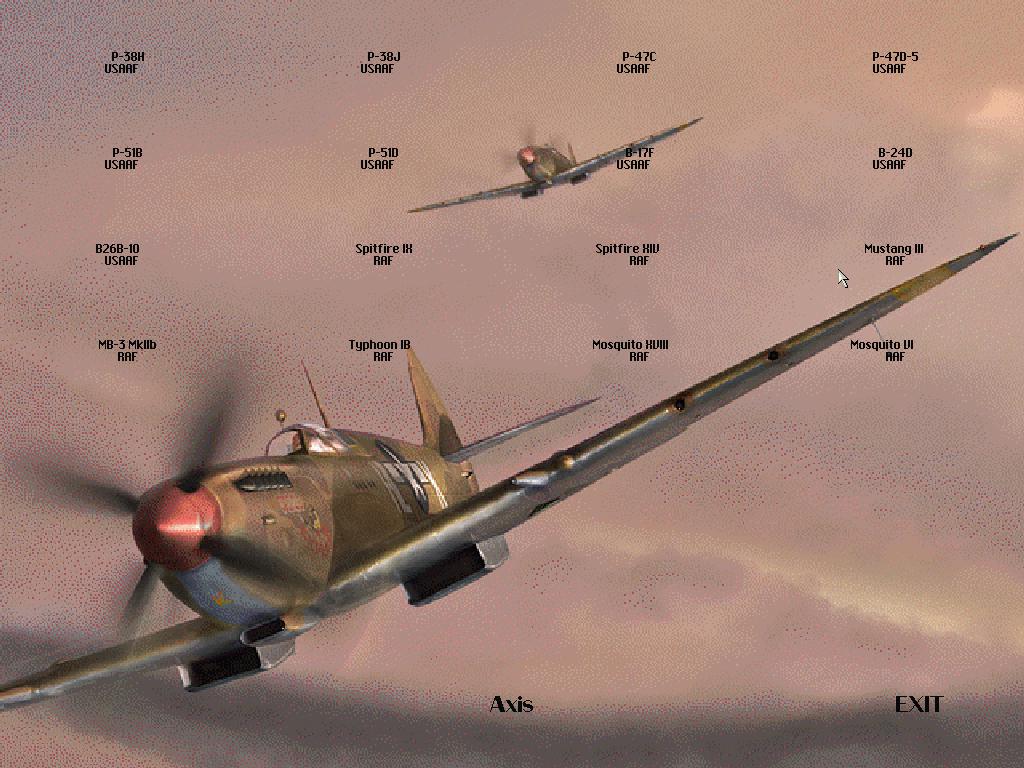
There's your newly installed plane, in the fifth Allied slot.
Select it for a mission.
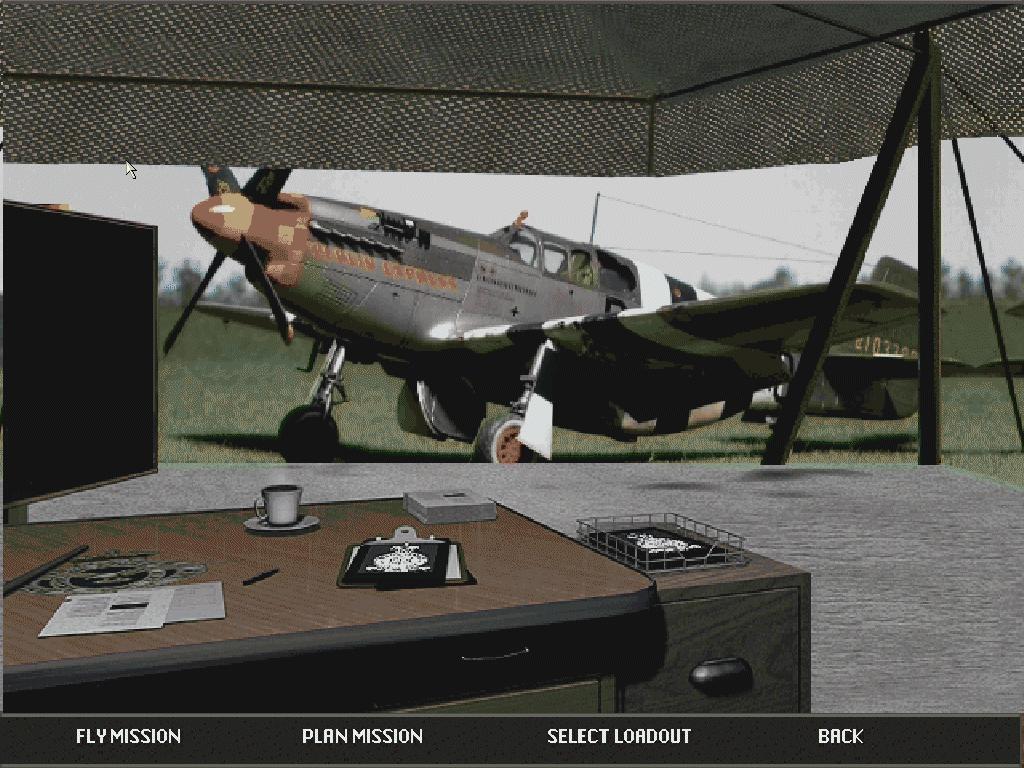
This is the default P51B hangar. You could make your own one. Just for now, to see the plane fly, just click on "Fly Mission"
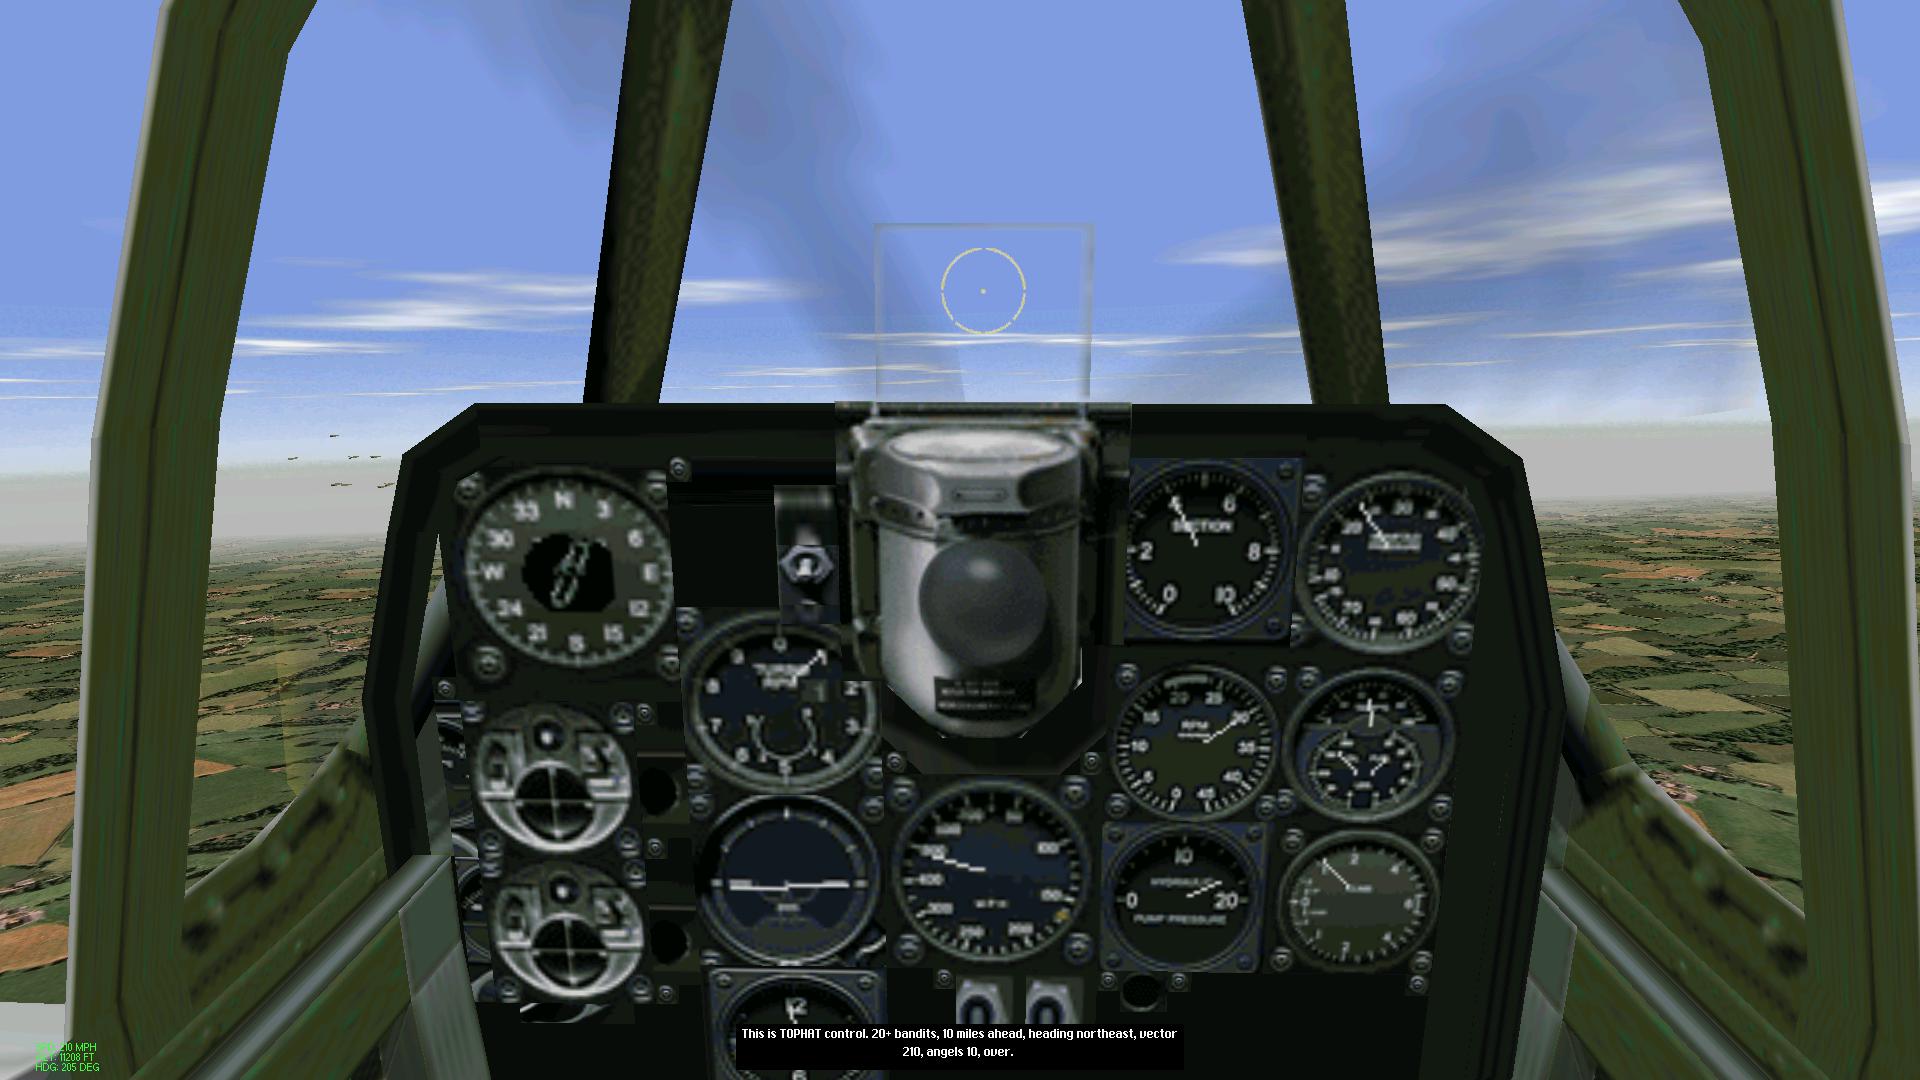
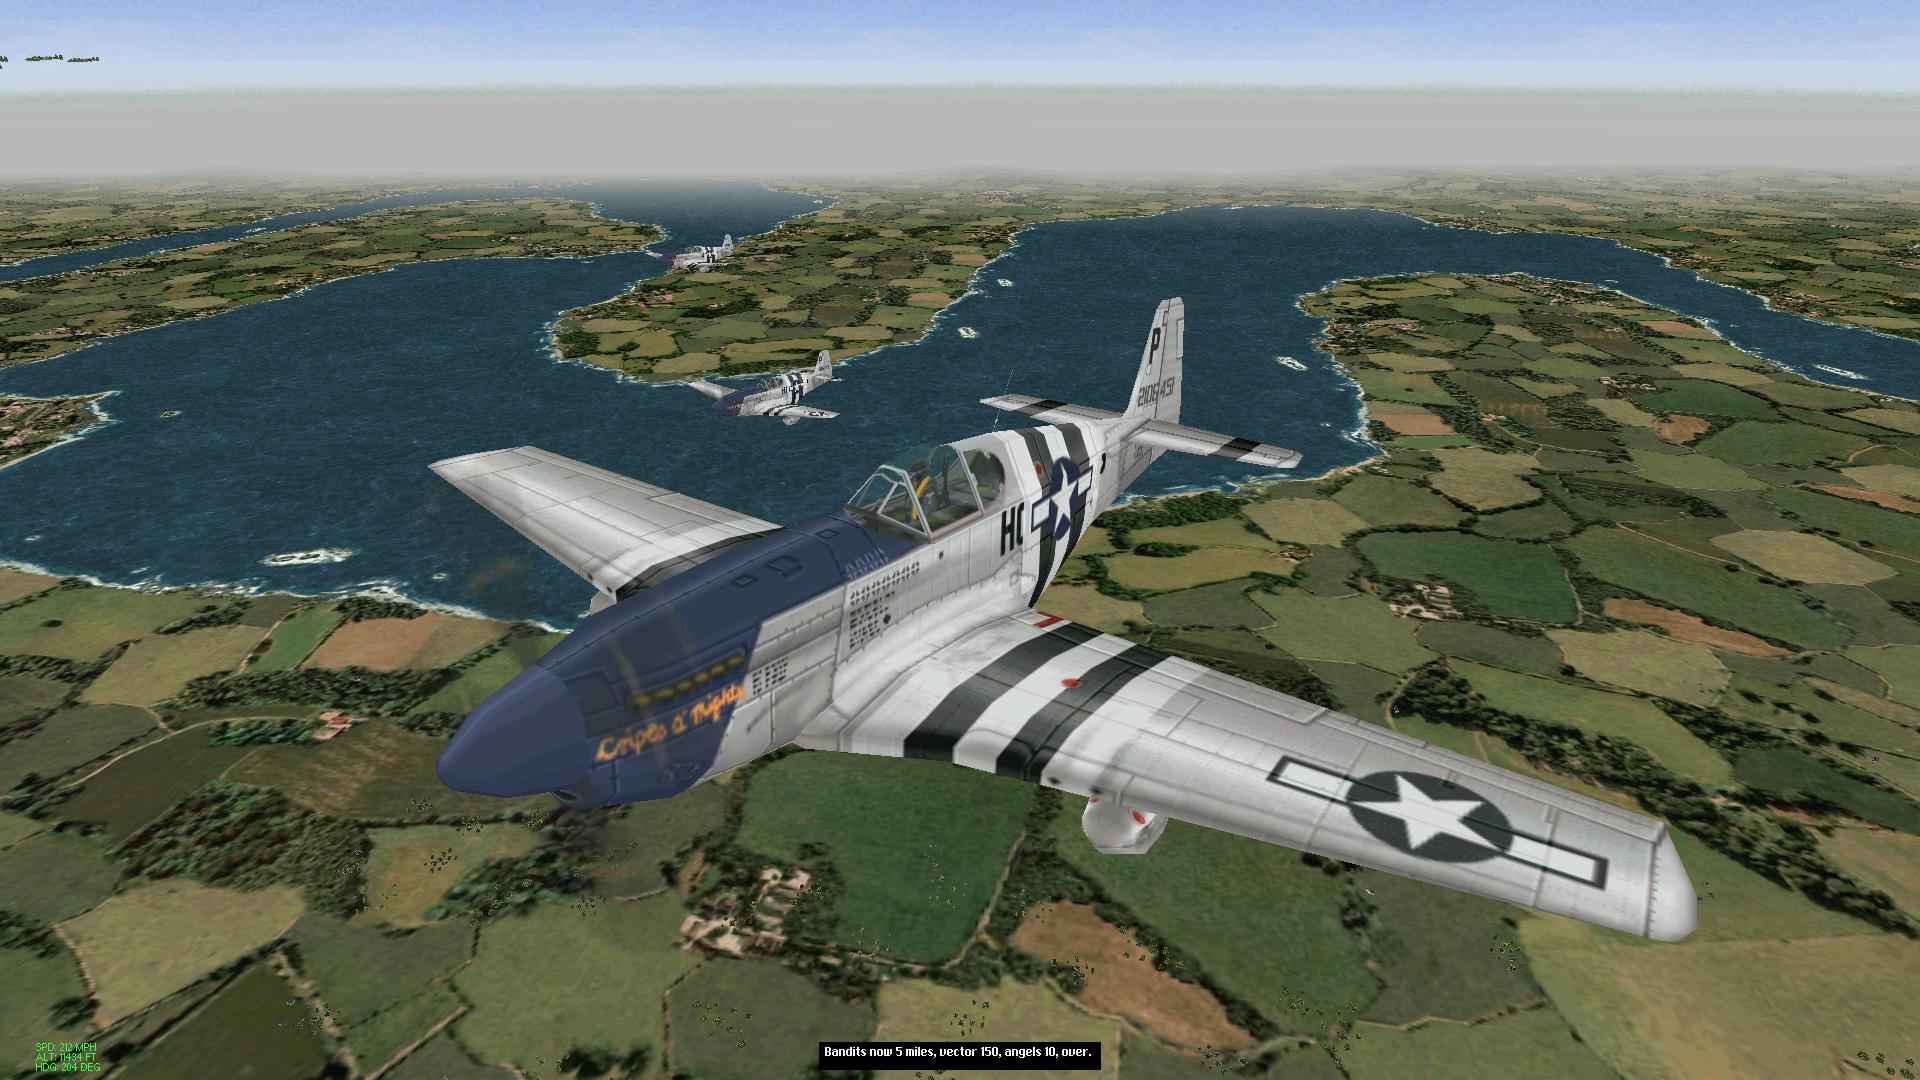
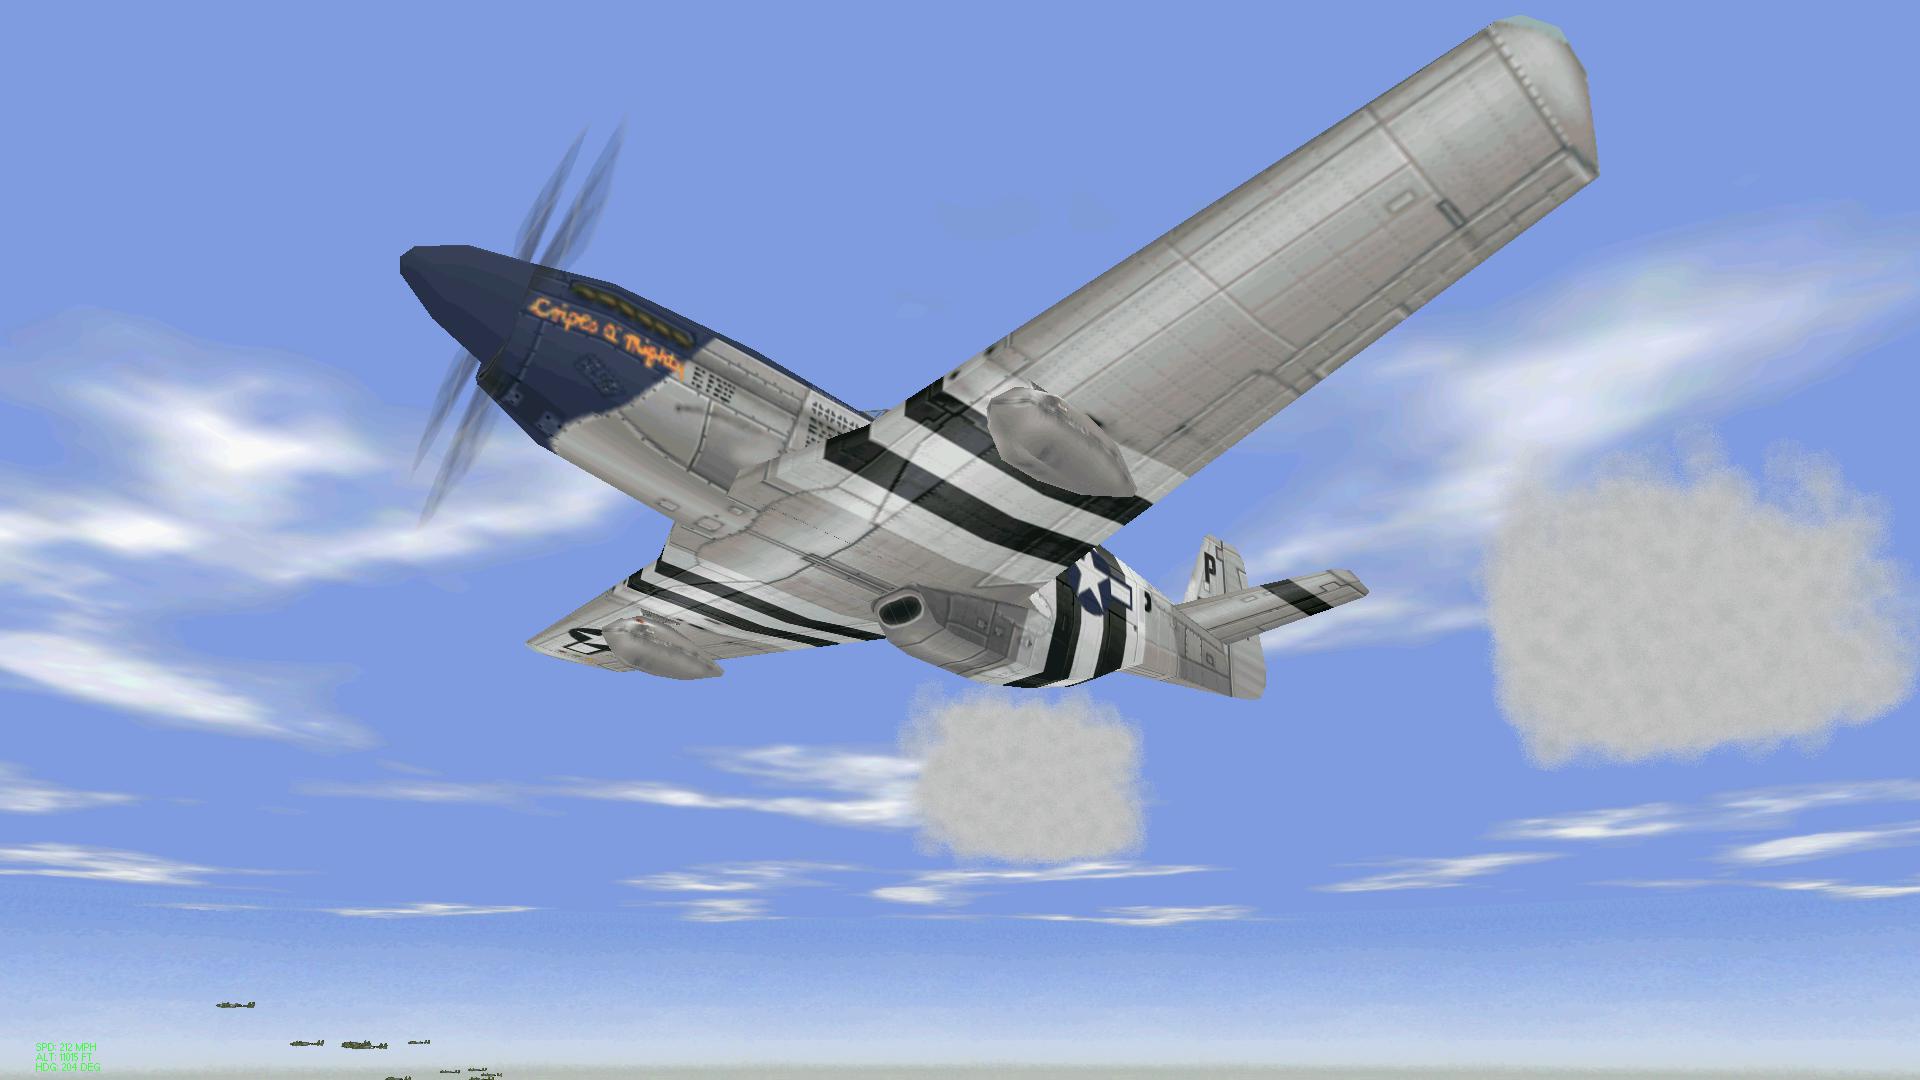
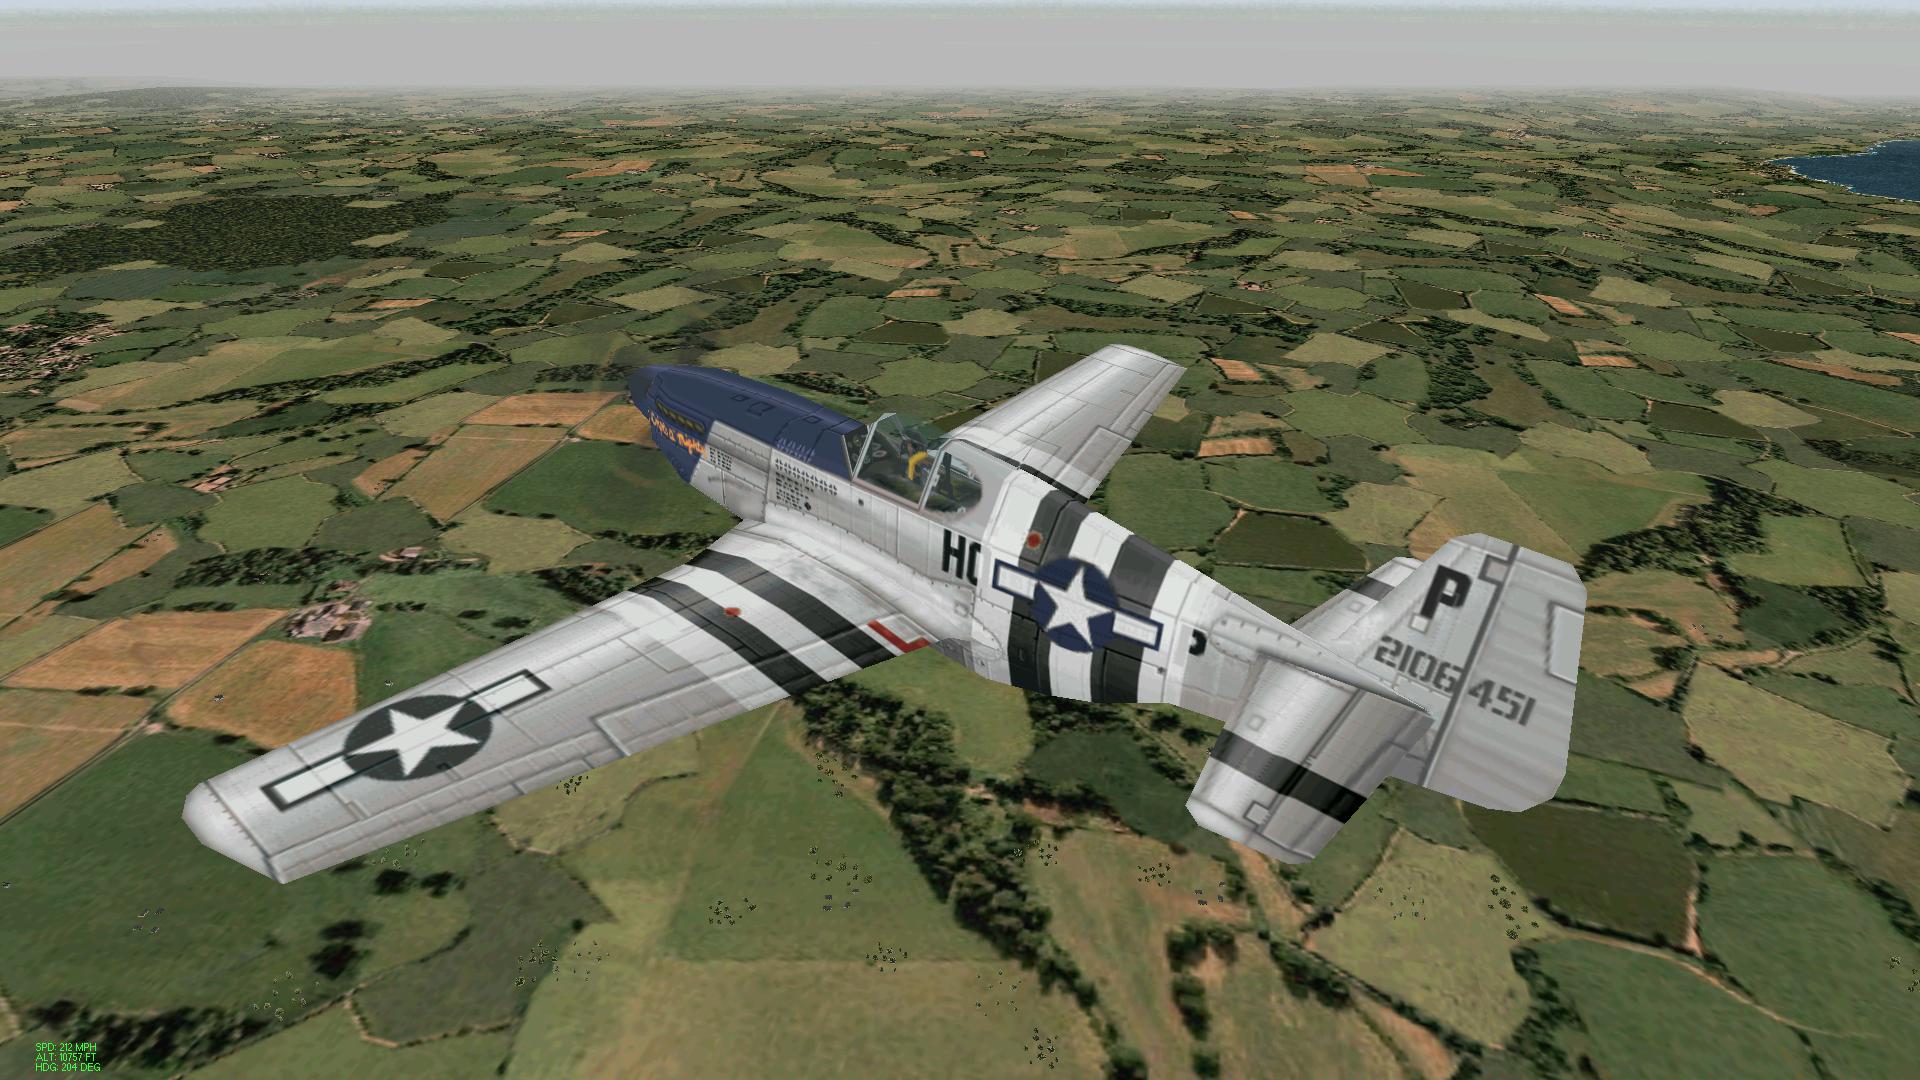
And there you are. Your downloaded 1.2 plane, converted and flying in 1.6.
You can build up a whole new planeset in this way.
Open the 1.6 Manager. In the lower left panel select the Default European Theatre. In the centre panel select your new planeset "My 1944 ETO planeset". A list of the set appears in the right blue panel.
Click "Launch EAW". Choose a single mission.
There's your newly installed plane, in the fifth Allied slot.
Select it for a mission.
This is the default P51B hangar. You could make your own one. Just for now, to see the plane fly, just click on "Fly Mission"
And there you are. Your downloaded 1.2 plane, converted and flying in 1.6.
You can build up a whole new planeset in this way.
Moggy
www.mogggy.org
www.mogggy.org