
(1) Obtain the PlanesetMaker.exe from this link: Plane-set editor April 3rd 2020
(2) Run it in your UAW160 folder. It will add the "PlanesetMaker.exe" and a folder named "Install runtime files"
If you have installed an earlier version of the editor then the runtime files will be installed already.
However, if you get an error message when you run the "PlanesetMaker.exe" then installing the runtime files by running the "setup.exe" (in the "Install runtime files" folder) should fix the problem.
If you need to run the "setup.exe" do not let it overwrite existing files with older versions.
(3) Run the "PlanesetMaker.exe"
On the left side of the Level one screen you will see two panes.
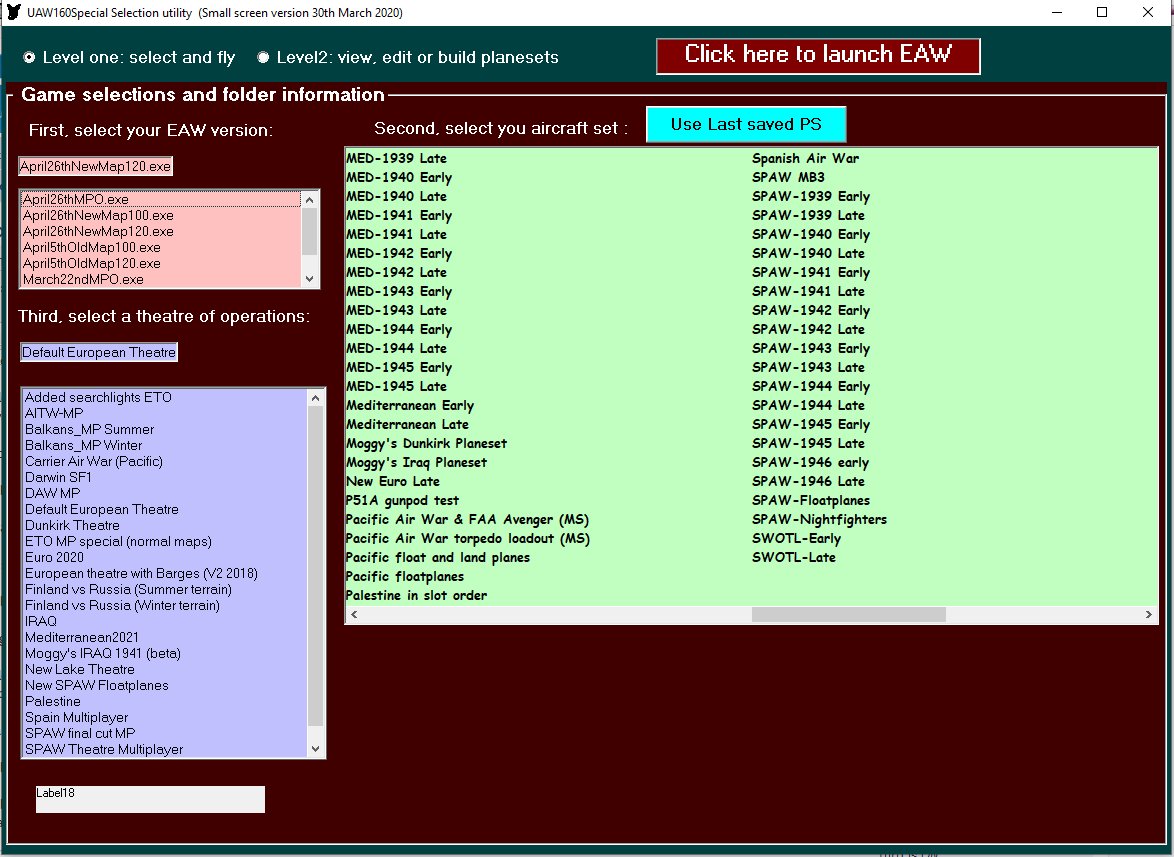
The top pane allows you to select which EAW exec you wish to use and the bottom pane allows you to select which scenario you wish to use. But don't worry about those at the moment. We are concentrating on editing a planeset.
In the right hand pane you will see all of the plane sets that are available in your 160 installation.
(4) Single click on any one of them and that plane set will load.
A new pane will open on the left side of the screen that lists those planes.
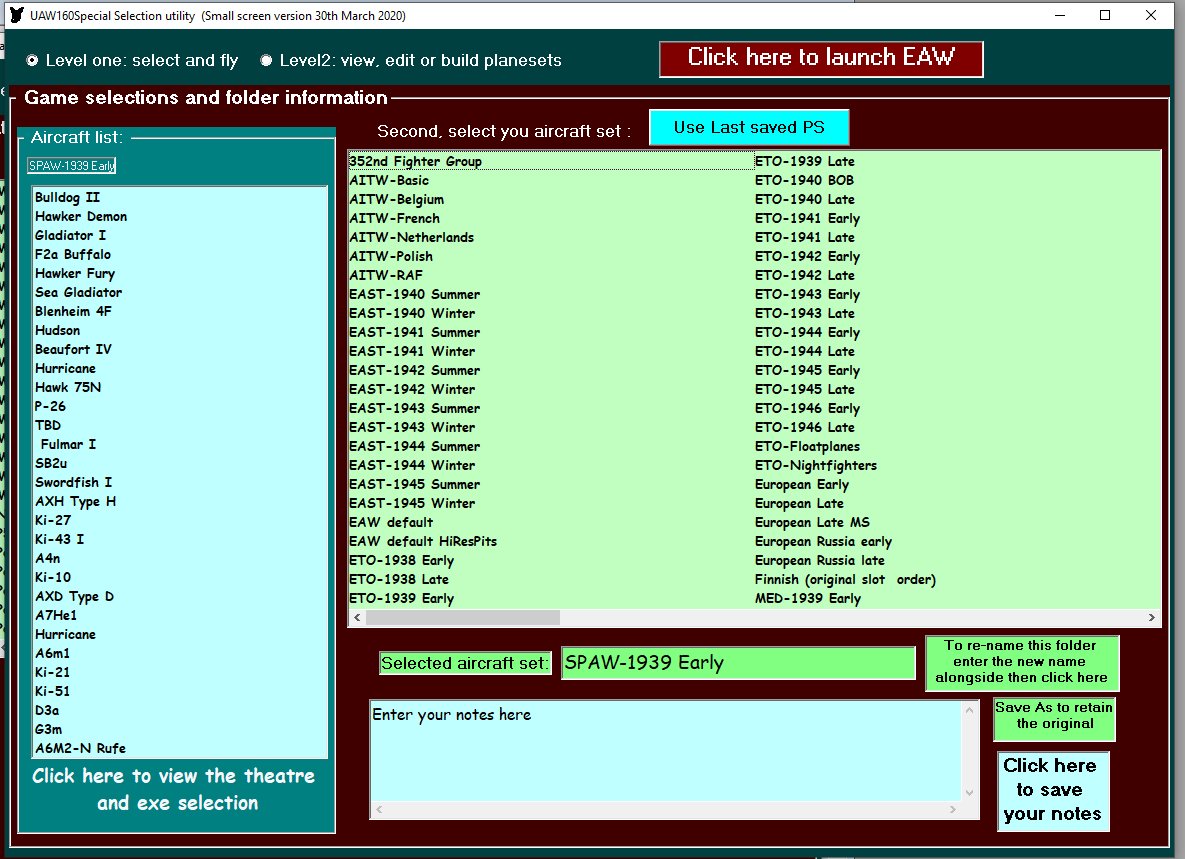
Pull the slider over in the right hand panel and select plane set "SPAW1939Early"
(5) Click on the radio button for Level two.
The program will now display two panes on the right with the folder structure for the EAW 160 installation.
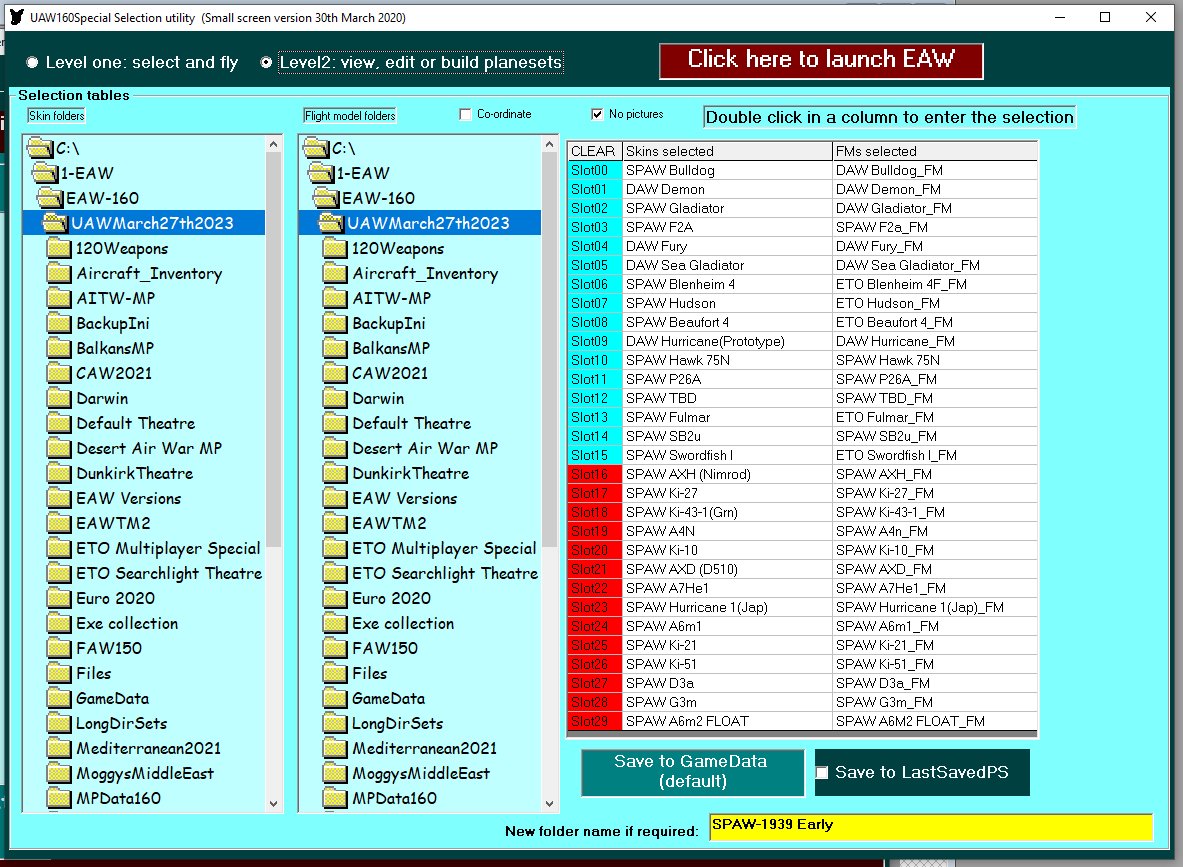
The far left pane is for selecting which skin and aircraft model you wish to use and the near left pane is for selecting the matching flight model. The right hand screen is where the selection process takes place.
Now that you have seen the two screens for level one and level two we can go through the process of editing a planeset
(6) In Level 2, tick "Coordinate" which will enable you to navigate both left hand panes at the same time.
(7) In the far left left hand pane navigate to the "Aircraft Inventory" folder and within that, the "SPAW Planes" folder. Note that the near left panel navigates similarly. Now Untick "Coordinate"
Note that within the "SPAW Planes" folder are two other folders, one for skins (the actual aircraft models) and the other for FMs (flight model and guns setup). In the far left pane, navigate to "Skins" and in the near left pane navigate to "FMs".
You will see two subfolders, Allied and Axis. You will also see that the right hand pane is broken into two sections. The top 16 blue slots (Slot00 to Slot15) are generally reserved for Allied aircraft while the bottom red 14 slots ( Slot16 to Slot29) are reserved for Axis aircraft. While you can add aircraft outside this division you may get odd results in the game, but especially in campaign mode.
(8) In this example you will be changing the Bulldog II in "Slot00" to the F4F-3.
Before making any changes enter a new name for your edited Planeset in the yellow rectangle at the bottom of the Level 2 page - if you don't do this, the Planeset you first selected will be overwritten.
As we editing an Allied plane setup, in both left hand panes navigate to the "Allied" folders for both skins and FMs.
Scroll down the list of aircraft until you find the F4F-3 in both the skin and FM's folders.
Single click on both subfolders to highlight them.
In the right hand pane double click on "Slot00".
The text in the "Skins selected" column will change from "SPAW Bulldog" to "SPAW F4F-3", and in the "FMs selected" column it will now read "SPAW F4F-3_FM"
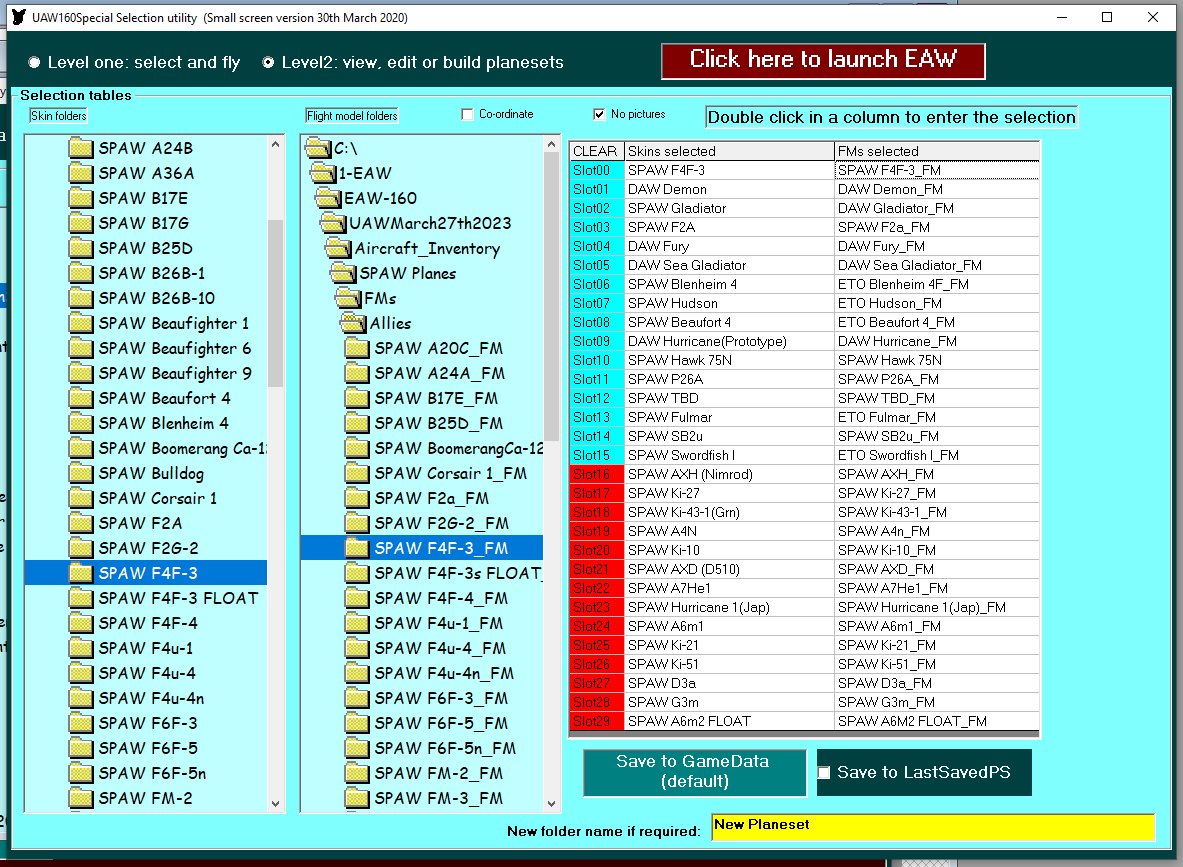
The F4F-3 has now been substituted for the Bulldog.
(9) If you wish to see that the game recognizes this change clink once on the dark green rectangular box at the bottom on the Level 2 page with the text "Save to GameData(default)"
Enter the game and verify that your change took place.
(10) Repeat this step as many times as you like to produce your own plane set.
Note that there is only one FM per specific plane type, but there may be variant skins for the plane in the other theater FM folders - ETO, EAST, DAW, etc.
If you don't see the appropriate FM in a particular folder you will need to go back up the folder tree and then back down into one of the other folders to find the correct FM.
(11) When completed once again click on the "Save to GameData (default) box and enter the game to verify your changes.
(12) Switch to the Level one page and you will see your new plane set has been added to the available list.
In this example we have changed the plane completely from the Bulldog to the F4F-3 by double clicking "Slot00" as both the skin and the FM needed to be changed. In other cases you may want to just change the skin of the same plane, and there is no need to change the FM.
To do this for the Bulldog we would just double click on the "SPAW Bulldog" in the "Skins selected" column. The skin will be changed but not the FM.
Similarly if you double click on the text in the "FMs selected" column then the FM will change but not the skin.
*******************************************
Written by Ray Otton and Tony West April 2020 and edited by Moggy and Ray Otton August 2023